
It doesn’t matter which type of device you’re using; there is always a chance to get your device damaged. Either it can be physical damage or logical damage. In most cases, physical errors occur inside the hard disk of your system. Logical errors occur in RAM or other components that include a transistor. Bad blocks or bad sectors occur when you can’t read or write any data on your hard disk in your Linux system. You shouldn’t get relaxed if you’re using a Solid-state drive (SSD). Sometimes logical errors are also seen on SSD. Bad blocks can be the cause of losing all your data from the hard disk or SSD. That’s why to prevent losing your valuable data; it’s essential to check if there are any bad sectors or bad blocks on your hard disk in the Linux system.
Bad Sectors or Bad Blocks on Hard Disk
Heat, dust, overclocking, unstable power supply, and partitioning in an improper way can be the reason for having bad blocks on your hard disk. Depending on how badly your hard disk is affected, damages can vary over time. Linux maintains a file system hierarchy, so to check the bad sectors on your hard disk, it is essential to find out the damage source.
For a hard disk, damages can occur inside the platter, read-write head, or the actuator arm can be displaced. For SSD’s damage can be either inside the NAND flash memory or in the host interface. In this post, we will know why the bad blocks or bad sectors occur on a hard disk and how to check the bad sectors in Linux.
Method 1: Use badblocks Tool to Check Bad Blocks on Hard Disk in Linux
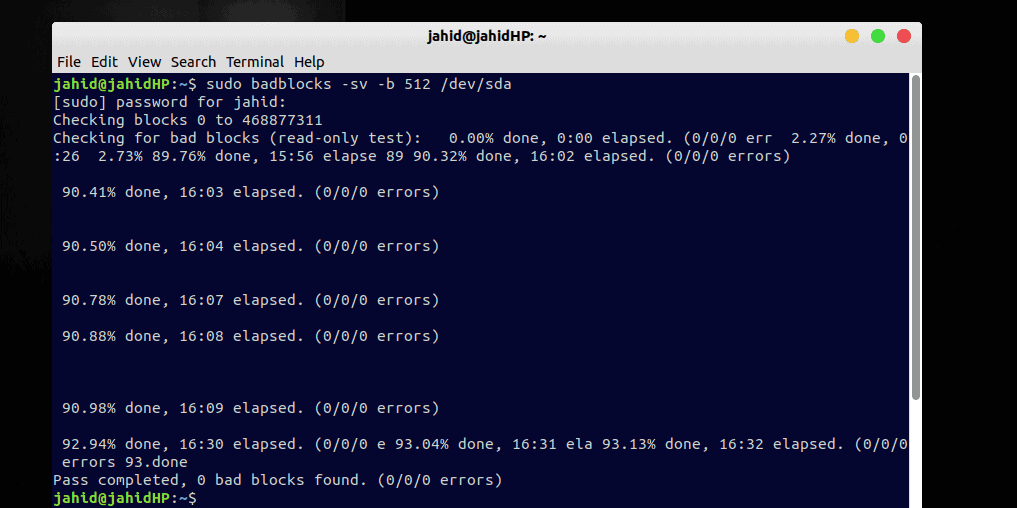
Using the badblock tool in your Linux terminal, you can find out the overall status of your hard disk. It will take a while to generate a full-body report. This terminal command can get the read-only permission, so it will not perform the data writing test. You can choose which partition of the hard disk device you want to check inside your command line.
$ sudo badblocks -sv -b 512 /dev/sda
$ sudo badblocks -s /dev/sda
If you want to get an automatically generated log file of all the bad sectors of your hard disk or storage system, you may try the badblock CLI written below. This command will generate a text file inside your directory if bad sectors are found.
$ sudo badblocks -v /dev/sda > badsectors.txt
For fixing the bad sectors from your hard disk, you can run this command line in your Linux terminal at your own risk. There is a chance to get your data erased. So, if you’re not an expert, don’t do it by yourself. Usually, e2fsck command can determine superblocks, bad blocks, block sizes, and a debugging method to rescue the hard disk.
$ sudo e2fsck -l badsectors.txt /dev/sda
Method 2: Monitor Bad Sectors on Hard Disk Using fdisk list Command in Linux
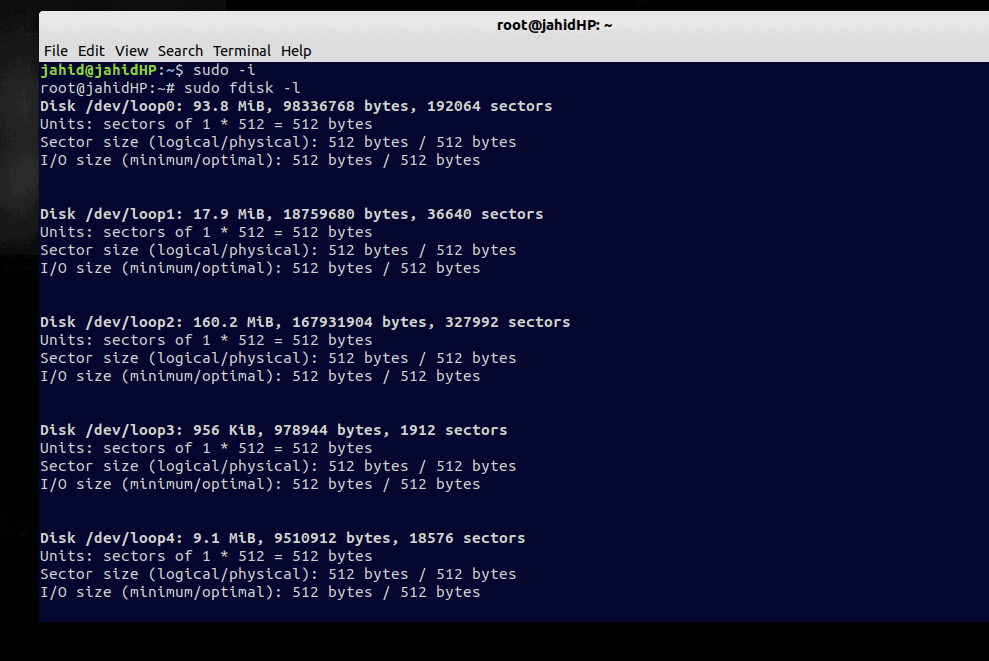
Before you check if there are any bad sectors inside your hard disk, you may need to get a list of all your storage devices that are connected with your Linux system. To get a display of connected hard disk/storage devices, you can always run the list command from your system terminal. Don’t forget to use the terminal as a superuser. Otherwise, your access can be denied.
$ sudo fdisk -l
Then it’s time to run a combing operation inside your Linux machine to find all the corrupted blocks of the hard disk. Let, we want to save the report card file in the temp directory. In that case, our CLI will be as exactly shown below. Here, the -v(visual) is will also display the progress of work in the terminal. Here, we are trying to find bad blocks of our sda disk; you will put your desired disk partition.
$ sudo badblocks -v /dev/sda > /tmp/bad-blocks.txt
Method 3: Check Bad Blocks on Hard Disk Using smarttools Command in Linux
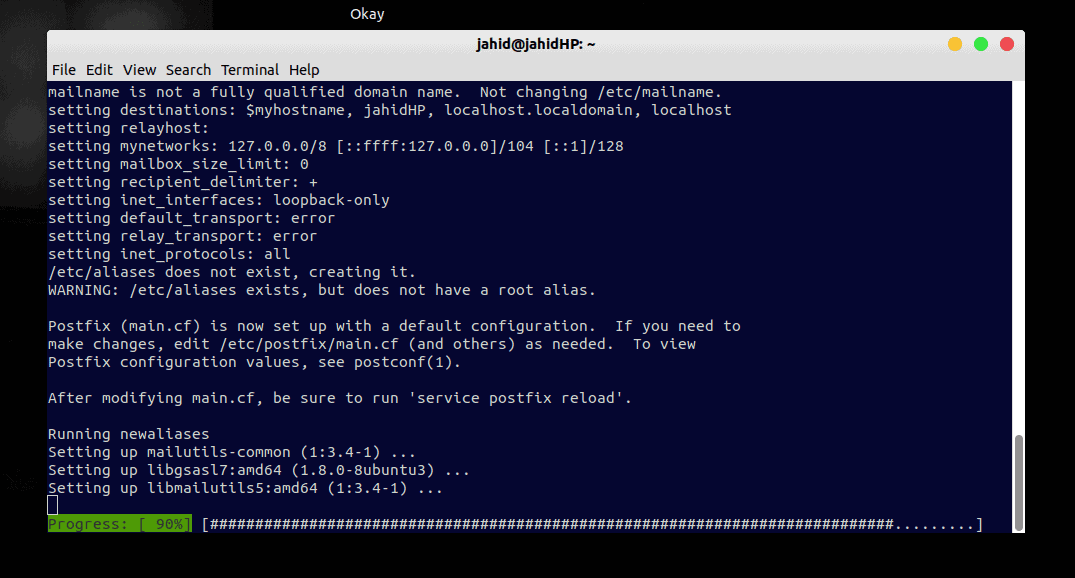
Smartmontools is a fundamental and neat disk report card tool for Linux that allows users to generate version, copyright, license, and health information. To install Smartmontools, follow the given terminal commands below.
$ sudo apt update
$ sudo apt install smartmontools
After the installation is done, you can now use the Smartmontools from the terminal in Linux. To get a self-generated smart report instantly on your display, use the smartctl command. Don’t forget to mention your hard disk partition.
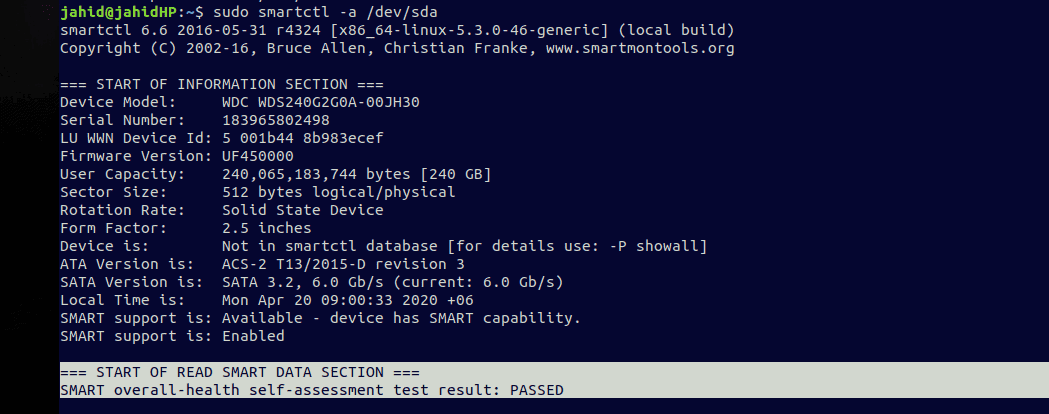
$ sudo smartctl -a /dev/sda
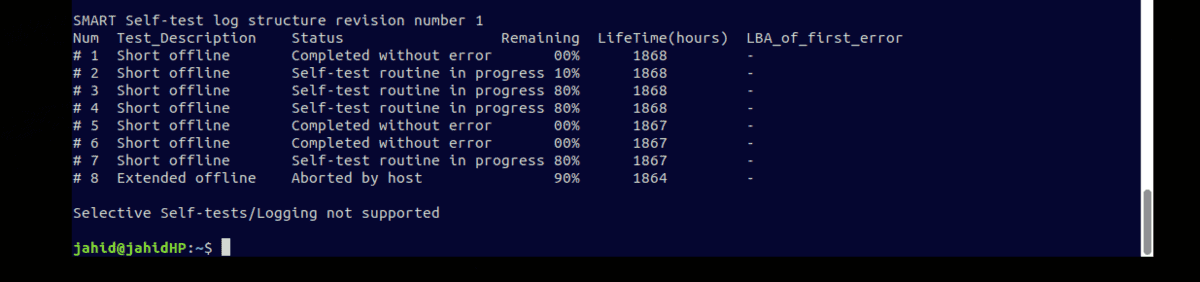
To check the overall test report of your hard disk, scroll below down in your terminal. You will find a full report card that includes the hard disk device model, serial number, firmware version, form factor, and most importantly, whether your hard disk has passed the overall-health self-assessment test or not!
Method 4: Check Hard Disk Assessment from Linux GNOME Disk Management Utility
Besides all the methods described above, there is also a quick method in Linux that allows you to check the current condition, temperature, cycle count, power-on hours, and an Overall Assessment of your hard disk. In Linux, for partition editing tasks, most users are very fond of using Gparted. Indubitably Gparted is a great tool.
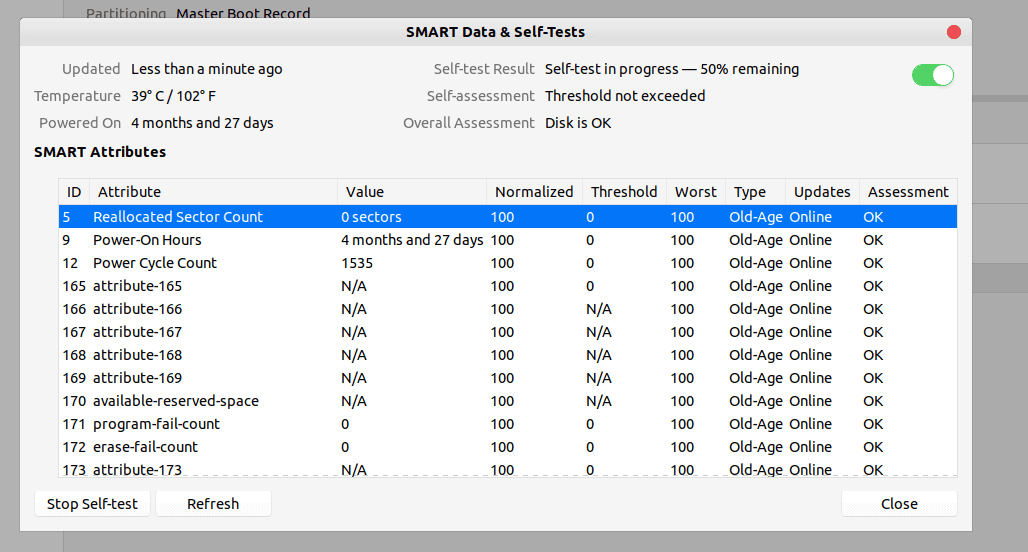
But apart from all the disk management utility tools, Linux comes with the default disk management utility for GNOME, named Disk! To get your hard disk information and status form Disk, open the Disk from your Linux system panel. After the Disk is opened, click on the three-dot menu and select the Smart data and self-test menu.
Here you go! You will be able to see a window like the given picture below. You will find the Start self-test button at the bottom of the window. Once you click the self-test button, it will be started, and after a while at the top right of the window, you’ll get the Overall Assessment report of your hard disk.
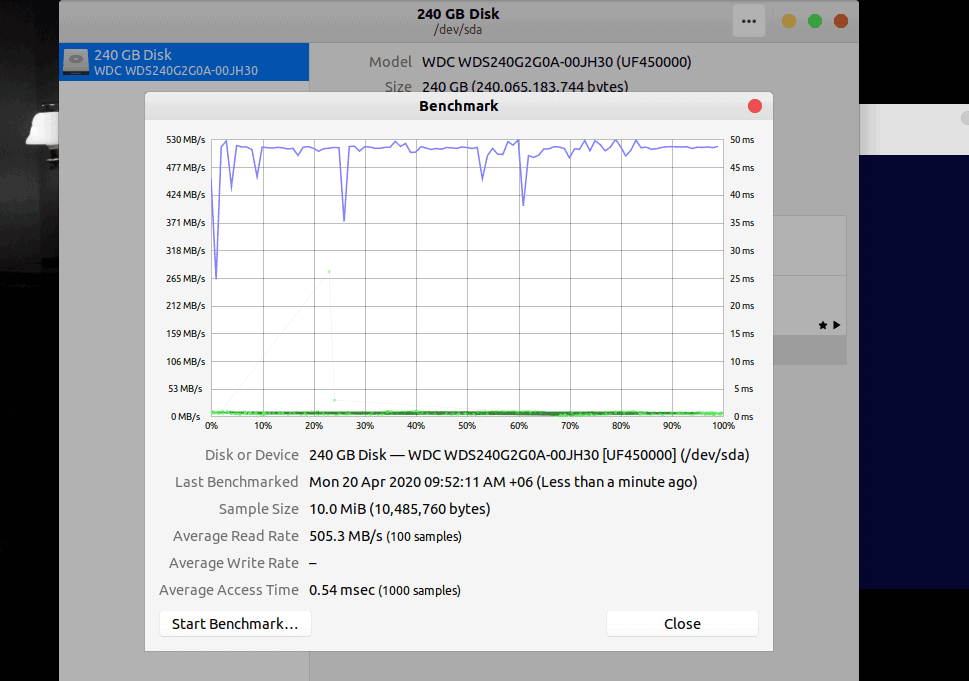
If you’re still curious, you can check the benchmark report of your hard disk from your Linux system. Same procedure as we’ve done just before, from the three-dot menu of GNOME Disk management utility select the Benchmark Disk, then click on Start Benchmark. You will see a benchmark graph report on your Linux display.
Final Thoughts
Rough use of a desktop can interrupt the data processing (read or write) inside the hard disk. Sudden powering off your machine can also damage the hard disk. Before taking your hard disk in life support, regular check-ups can save the life of your hard disk. In this post, we have explained some common errors that can occur in your hard disk and also demonstrated several methods of how to check the bad sectors or bad blocks in the Linux system.
If you’re not a crazy system administrator, of course, you love your data. Share this post among your Linux user community and also do comment if you want to ask or add anything related to this post.
All very well but what if:
* Disks has no SMART Data & Self-Test Option (greyed out)
* Disks unable to check filesystem due to “error unmounting /dev/.sdc1: target is busy (udisks-error-quark, 14)