
As you are using a Linux system, you probably already know that HTTP is an internet protocol that establishes your internet connection to your requested server through your web browser. It sends requests from the client’s end to the server end and conveys data from the server to the client. Well, that is enough to know about the HTTP protocol if you are a regular internet user. If you are a server administrator or a network manager or host your own website on an Nginx server, you need to know more about HTTP, HTTP/2.0, and how to enable HTTP/2.0 in the Nginx server.
Enable HTTP/2.0 in Nginx
As an Nginx server admin, you must have heard about the OSI and the TCP model; the HTTP is in the OSI model‘s application layer. You can apply the HTTP2 on your Nginx server to make your server more speedy, efficient, and secure.
To configure the HTTP services on your system, you need to have the Nginx server installed on your machine. In this post, we will see how to enable and configure the http2 on your Nginx server.
Step 1: Check Prerequisites for Nginx HTTP/2.0
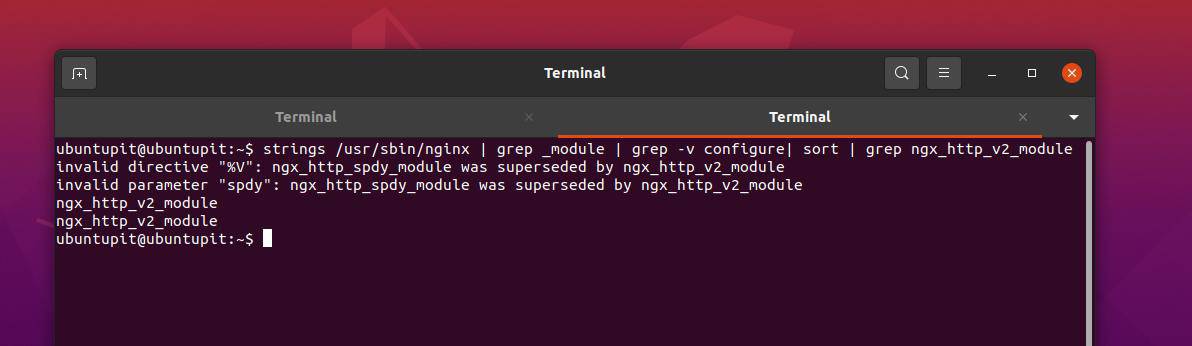
As you already have the Nginx server installed on your machine, to enable the HTTP/2.0 services, you might need to check whether your system has the capability to handle the next version of the HTTP protocol. To check the HTTP modules, you can run the following GREP (Global Regular Expression Print) command on your terminal shell.
strings /usr/sbin/nginx | grep _module | grep -v configure| sort | grep ngx_http_v2_module
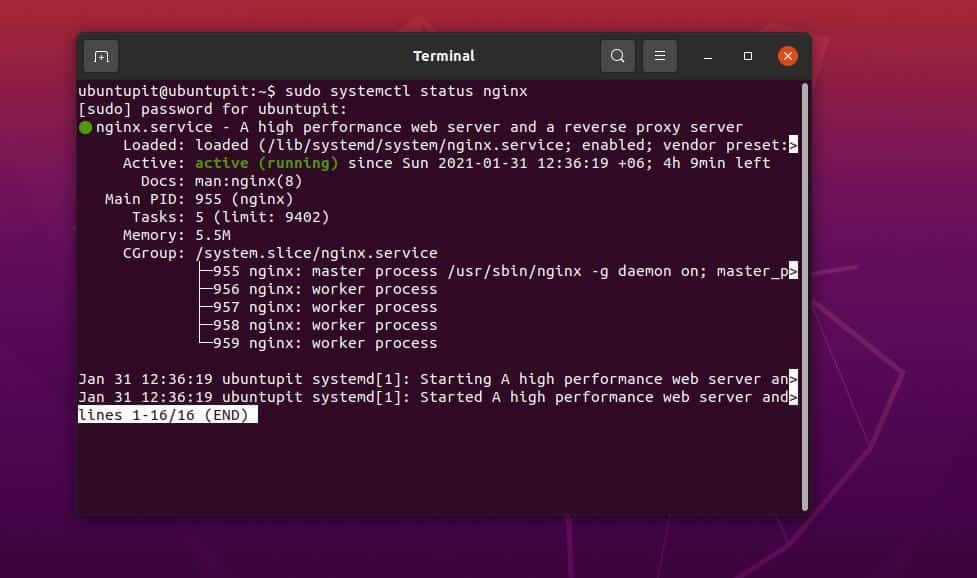
You can also run the following system control command to check the status of your Nginx server.
sudo systemctl status nginx
Step 2: Enable HTTP/2.0 on Nginx
Enabling the HTTP/2.0 services on an Nginx server is straightforward. You need to have the root privilege on your machine. You can run the following command on your Linux terminal to edit and configure the HTTP/2.0 protocol on your server.
The following command would change the HTTP connection type from your Nginx filesystem stored inside the /etc/nginx/ directory. Choose the appropriate command for your Linux distribution from below.
Edit Nginx server configuration on Ubuntu/Debian
sudo nano /etc/nginx/sites-available/example.com.conf
Edit Nginx server configuration on Red Hat and Fedora Linux
sudo nano /etc/nginx/conf.d/example.com.conf
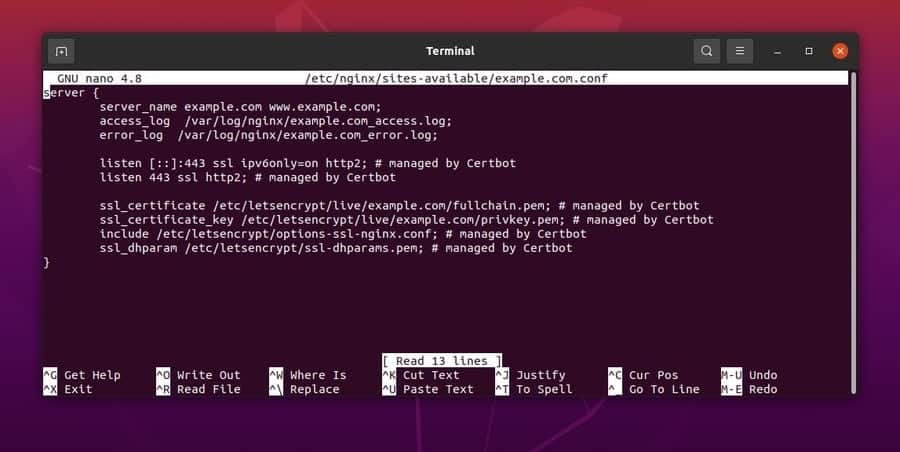
Now, you have to add the following HTTP protocol line inside the script.
listen 443 ssl http2;
You can follow the sample script that is given below. Make sure that you replaced your server address with example.com.
server {
server_name example.com www.example.com;
access_log /var/log/nginx/example.com_access.log;
error_log /var/log/nginx/example.com_error.log;

listen [::]:443 ssl ipv6only=on http2; # managed by Certbot
listen 443 ssl http2; # managed by Certbot

ssl_certificate /etc/letsencrypt/live/example.com/fullchain.pem; # managed by Certbot
ssl_certificate_key /etc/letsencrypt/live/example.com/privkey.pem; # managed by Certbot
include /etc/letsencrypt/options-ssl-nginx.conf; # managed by Certbot
ssl_dhparam /etc/letsencrypt/ssl-dhparams.pem; # managed by Certbot
}
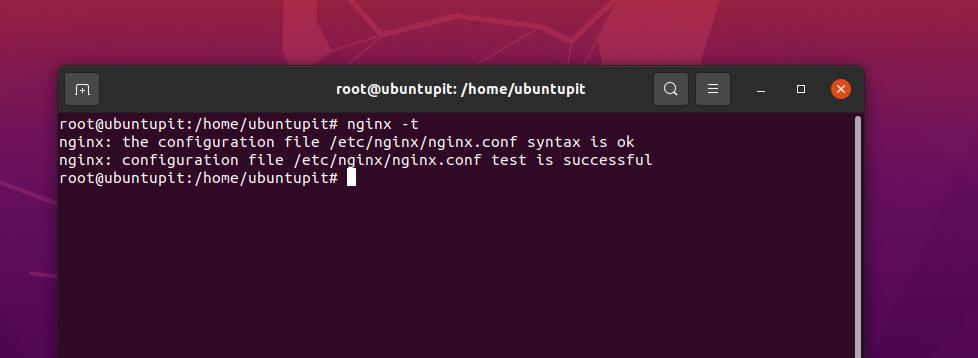
You can now check the configuration status of your Nginx server.
nginx -t
You can now run the system control command given below to restart your Nginx server.
systemctl restart nginx
Step 3: Check and Close
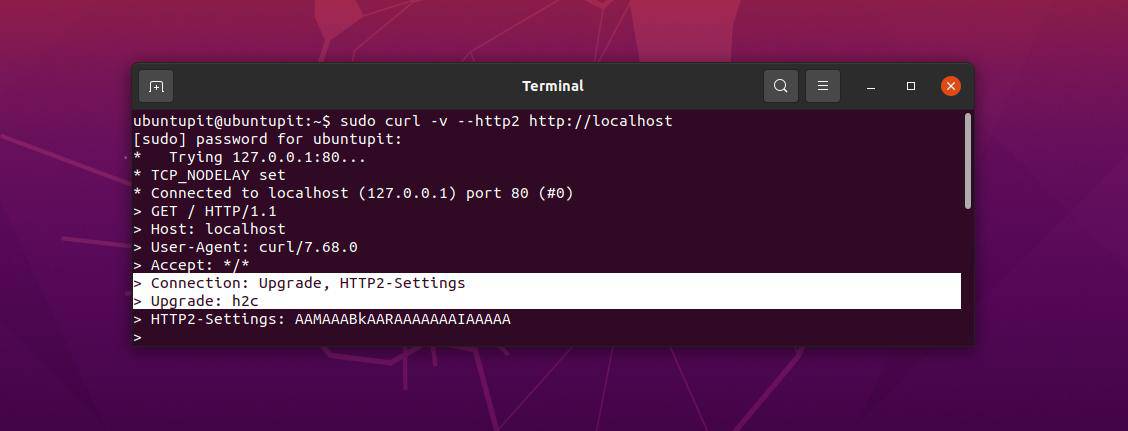
We have now seen how to enable the HTTP/2.0 services on an Nginx server; it’s time to check whether it is enabled or not. There are two methods to know it. You can either run the following cURL command on your terminal shell to check the HTTP status.
sudo curl -v --http2 https://localhost
The command will return the server connection status and the HTTP version status.
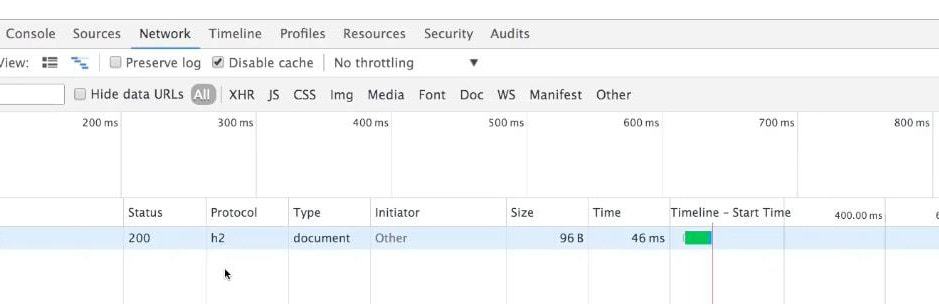
You can also check the HTTP version status through your web browser. First, enter your server’s web address and visit the site. Then right-click on your mouse and select the Inspect Element menu. Then you would find the Network Tab. Under the Network Tab, find the protocol menu and check whether the HTTP/2.0 is enabled or not on your Nginx server.
Be Careful!
Enabling the HTTP/2.0 on your Nginx server can allow multiple requests to the server and make the binary protocols faster. However, enabling HTTP/2.0 has both pros and cons. Enabling the HTTP/2.0 can be abused to use the server push system.
If you have a mixed-mode connection (enabled HTTP/2.0 in the client but not enabled in the server), it can make your connection slower. You should make sure that both the server end and the client end has the http/2.0 services enabled.
Final Words
The HTTP/2.0 protocol can compress the binary data and respond to multiple requests at a time. In the entire post, we have seen how to enable the HTTP/2.0 services on an Nginx server. I have also described the fundamentals and the precautions of enabling HTTP/2.0 on a server.
Please share it with your friends and the Linux community if you find this post useful and informative. You can also write down your opinions regarding this post in the comment section.