
If you are a database engineer or data analytics, I am sure you have already heard the name of Anaconda Navigator and JupyterLab. Both are Python interpreter used to code python for database handling. Indeed, the use of Python for data science is now no longer a choice rather obvious. Python has a vast library and syntax for data visualization and data output. Now here, confusion arrives when you want to learn Python. Still, you can’t understand which distribution of Python you should select and which Python IDE (Integrated Development Environment) is helpful for database management.
Anaconda Navigator and JupyterLab both are the open-source distribution of Python. If you’re a Linux user and you are used to the command prompt or terminal for Python, I’m sure you’re looking for a simple but effective environment to write python where you can input and output data files. In Linux, Anaconda Navigator, and JupyterLab, both are very effective and powerful Python interpreters used for data science and machine learning.
Anaconda Navigator and JupyterLab
![]()
If you are using Mac or Linux, your system already has installed Python. You can check the Python version from the terminal. Hence, Anaconda Navigator and JupyterLab have all supported Python libraries like matplotlib,numpy,pandas, etc. Anaconda Navigator is used for both data science and machine learning. To use Anaconda, we will be using the Anaconda graphical user interface named Anaconda Navigator.
The name Jupyter has come from the combination of these three programming languages Julia, Python, and R. JupyterLab is a web-based Python environment. I must mention that Jupyter Notebook comes pre-installed with Anaconda Navigator, where JupyterLab is the next updated version of the Jupyter Notebook.
Today in this post, we will learn how to install Anaconda Navigator and JupyterLab in Linux. We will also see how to use Jupyter Notebook-web by using Google Colab.
How to Install Anaconda Navigator in Linux
To install Anaconda Navigator in Linux, first, you need to download the bash file of Anaconda. You will find the bash file on the official website of Anaconda. Bash file allows us to install files from the shell script. You can also download the installer file from the bash command in the terminal.
Step 1: Installing Python 3.7 to Install Anaconda Navigator in Linux
Currently, Anaconda requires Python 3.7 version. So make sure that your Linux machine has updated Python. You can also find Anaconda installer files for the older version of Python. Use these terminal commands to upgrade Python if necessary.
$ sudo apt-get install python3.7
$ sudo update-alternatives --install /usr/bin/python3 python3 /usr/bin/python3.6 1
$ sudo update-alternatives --install /usr/bin/python3 python3 /usr/bin/python3.7 2
$ sudo update-alternatives --config python3
Step 2: Downloading Anaconda Navigator in Linux
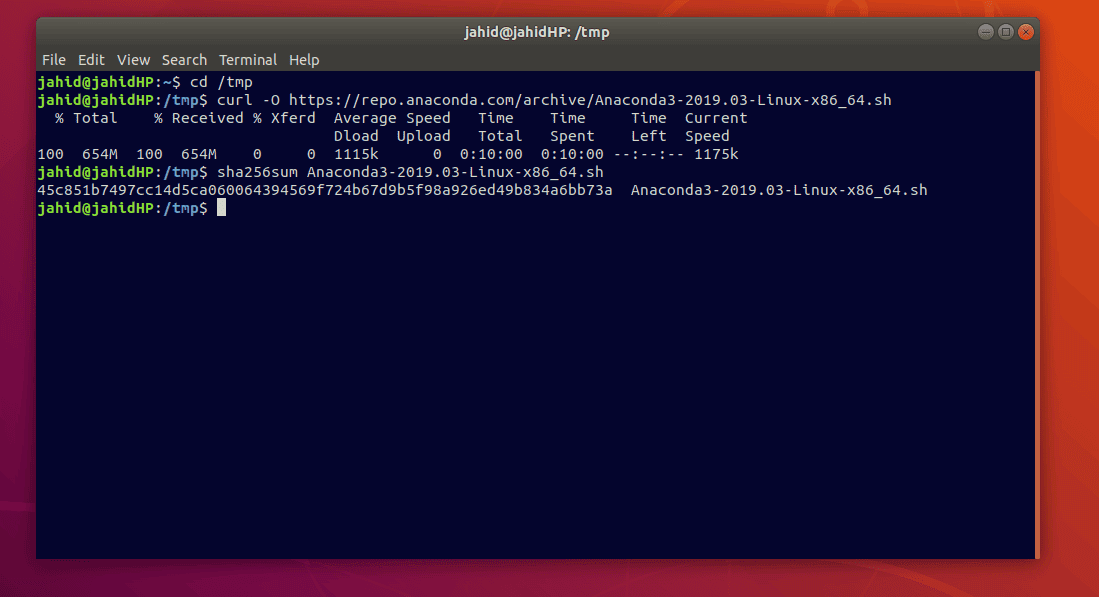
Now after Python is updated, it’s time to download the Anaconda bash file. Let us create a temp folder to store the Anaconda bash file. You can download the bash file using the following command.
To download the Anaconda Navigator file, I will use the cURL command. cURL command can download and store files directly from FTP or authentic Linux server. After the curl command is run, you will see the file size, download speed, estimated time required in your terminal.
$ cd /tmp
$ curl -O https://repo.anaconda.com/archive/Anaconda3-2019.03-Linux-x86_64.sh
You can also download the Anaconda Navigator file manually from the official website of Anaconda. For that, while installing process arrives, you have to open the Anaconda Navigator file in the terminal manually.
After the download is finished, we will be using the sha259sum program to check if the download is verified or not. This sha259 program is used for monitoring the file repository to verify the file.
$ /tmp$ sha256sum Anaconda3-2019.03-Linux-x86_64.sh
Step 3: Installing Anaconda Navigator in Linux
Now I will run the bash shell command in the terminal to install the Anaconda Navigator. Bash command can read, write, and install files from the terminal.
$ /tmp$ bash Anaconda3-2019.03-Linux-x86_64.sh
Here, as I have downloaded the Anaconda Navigator in my temp directory, so I’m running the bash command inside the temp folder. You have to mention your directory for using bash command.
In the installing process, you will be asked for your permission to initiate the process, and you’ll also be asked to choose the directory where you want to install Anaconda Navigator.
After the installation process is done, it will show a success message on your terminal screen. Now comes the activation of the bash file. For that, type the following command in your terminal.
$ /tmp$ source ~/.bashrc
Now, you can see the list of packages installed inside the Anaconda Navigator.
$ /tmp$ conda list
To run the Anaconda Navigator in your Linux machine, just type the following command in your terminal.
$ /tmp$ anaconda-navigator
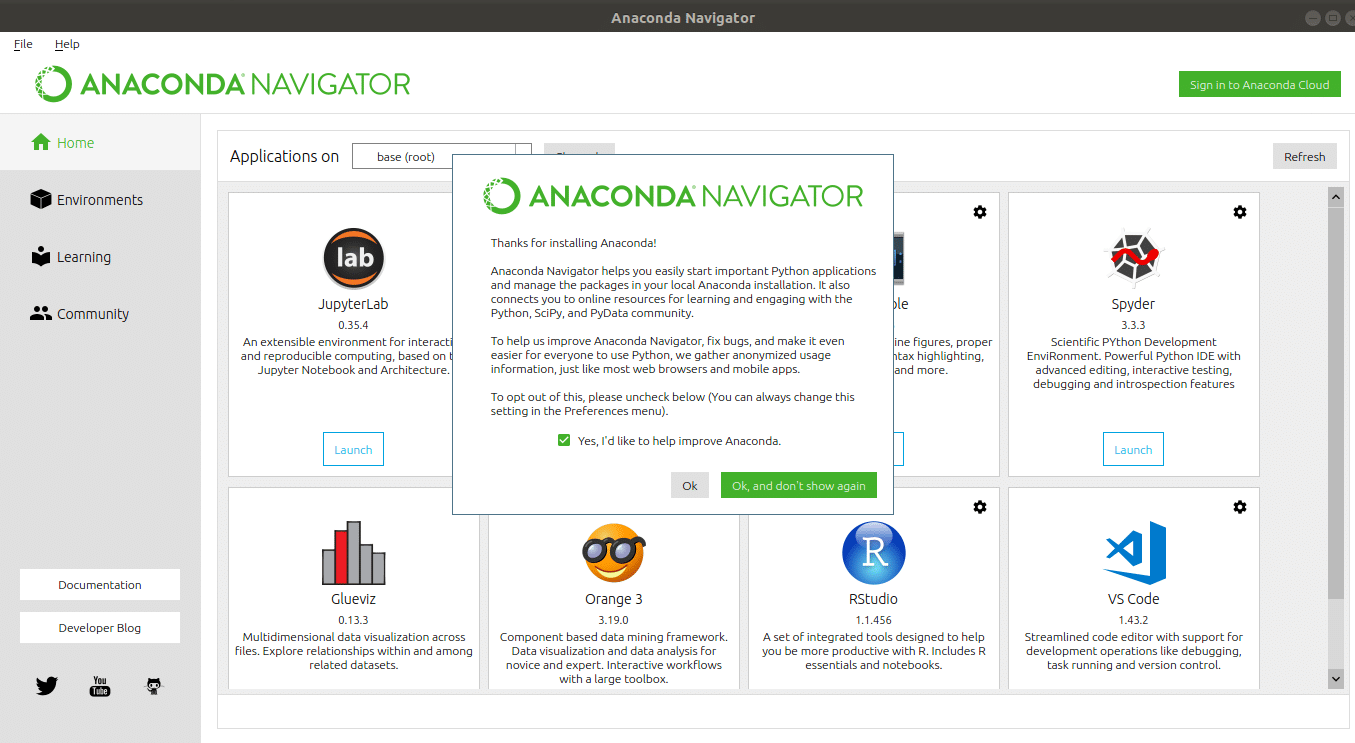
After the Anaconda Navigator is opened, you will see the pre-installed environments displayed on the screen. Here I’m dropping the list of applications that you get with Anaconda navigator.
- JupyterLab
- Jupyter Notebook
- Qt Console
- Spyder
- RStudio
- VS Code
- Glueviz
- Orange 3
Bonus Tip: Installing Anaconda Navigator on other Linux Distros
The process of installing Anaconda Navigator in all Linux distributions are mostly the same. All you need to confirm that you have Python 3.7 installed in your machine. And have to be careful while using the bash commands. Be mindful of using the download directories.
You can create a new folder to store the Anaconda Navigator installer files instead of using a temp folder. Follow the instructions to create a new folder from the terminal. All the other instructions are the same, as shown previously.
$ cd ~
$ mkdir NewFolder
$ cd NewFolder
$ curl -O https://repo.anaconda.com/archive/Anaconda3-2019.03-Linux-x86_64.sh
Installing JupyterLab in Linux
As you have already seen that, the JupyterLab is already installed inside the Anaconda Navigator, you can run JupyterLab from the Anaconda Navigator, or you can install JupyterLab individually for better performance. You can also install Jupyter Notebook in your Linux if you need it. Actually, JupyterLab has vast library access to Python, and all functions are arranged very nicely.
Step 1: Creating pip Environment to Install JupyterLab in Linux
The pip command is used to install the authentic and additional Python package in Linux. We will be using the pip command to create the environment of Python. To create a new environment, we will use the pipenv command.
- First, you need to install the Python 3 in your Linux machine. To do that, just follow the command line provided below in your terminal.
$ sudo apt-get install python3-pip python3-dev
- Now, the vital part comes, creating a pip user environment for Python in Linux. For that, we will be using the pip3 command. This will handle both pip and python-dev package.
$ Pip3 install --user pipenv
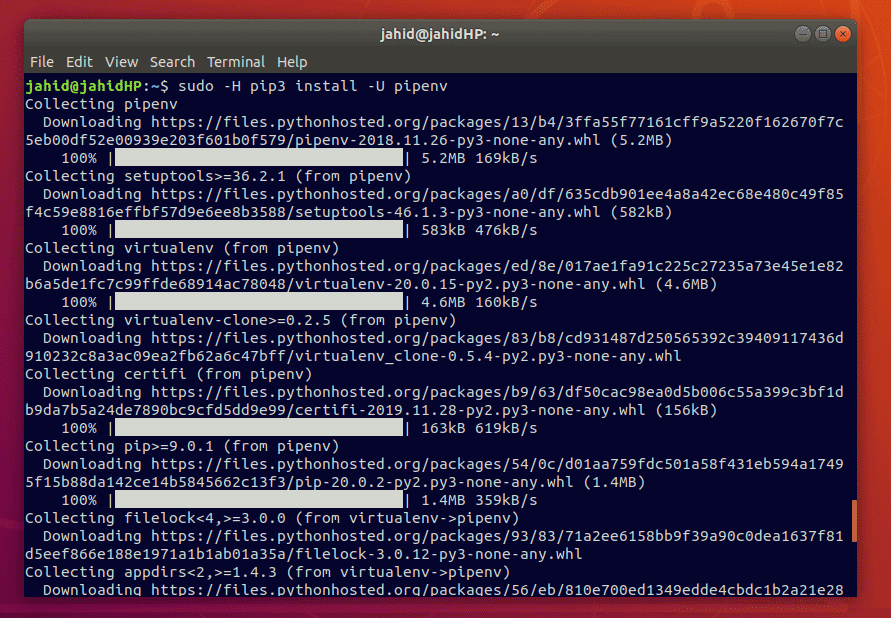
- If you find any error message, you can use the following command to get rid of pip errors!
$ sudo -H pip3 install -U pipenv
Step 2: Making a Project Directory for JupyterLab in Linux
The fundamental of making a project directory for JupyterLab is simple; it will store all the file that is generated from JupyterLab inside the particular folder. You can create a folder manually, or you can use the following make directory mkdir commands in the terminal.
$ cd ~/Desktop
$ sudo mkdir <folder name>
Step 3: Installing Jupyter Console in Linux
After the project directory is created, you can now install the Jupyter console inside your Linux machine. For that, we can use the pip environment that has created earlier.
$ pipenv install jupyter
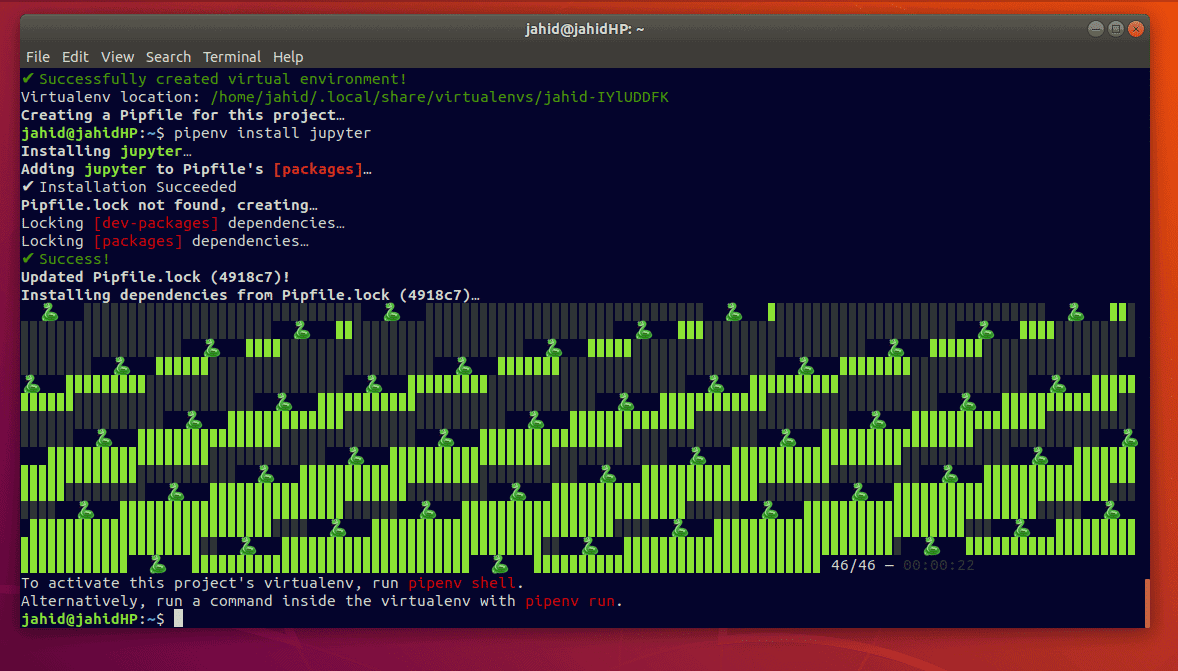
After you see the Success message in your terminal, you have to run a shell command to activate this project’s virtual environment. Just follow the shell command given below.
$ pipenv shell
Step 4: Installing JupyterLab in Linux
Here comes the final step, installing JupyterLab. As we have already created the virtual environment for Jupyter console now, we can quickly run the pipenv shell commands in our Linux system. To install JupyterLab from pip command, follow the terminal command kept below. You can also install JupyterLab by pipenv (pip environment) command. Both processes are given below. You will see the progress bar of the installation process in your terminal.
- For
pipshell command
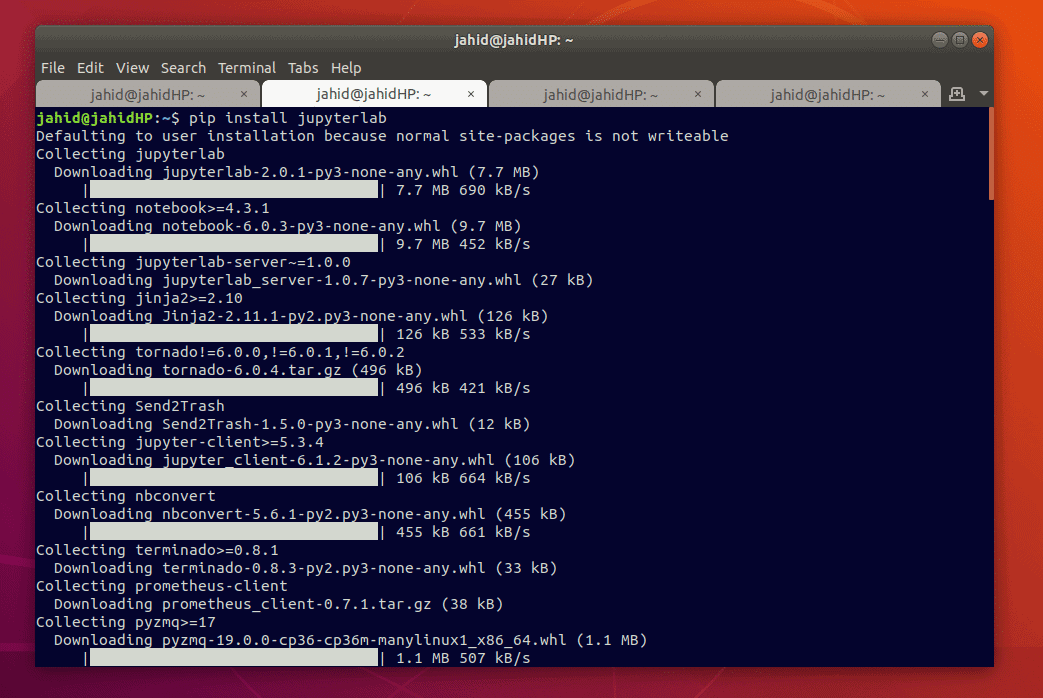
$ pip install jupyterlab
- For
pipenvshell command
$ pipenv install jupyterlab
$ pipenv shell
And after the installation is done, type the following command in your terminal to open JupyterLab.
- For
pipenvshell command
$ pipenv shell
$ jupyter lab
- For
pipshell command
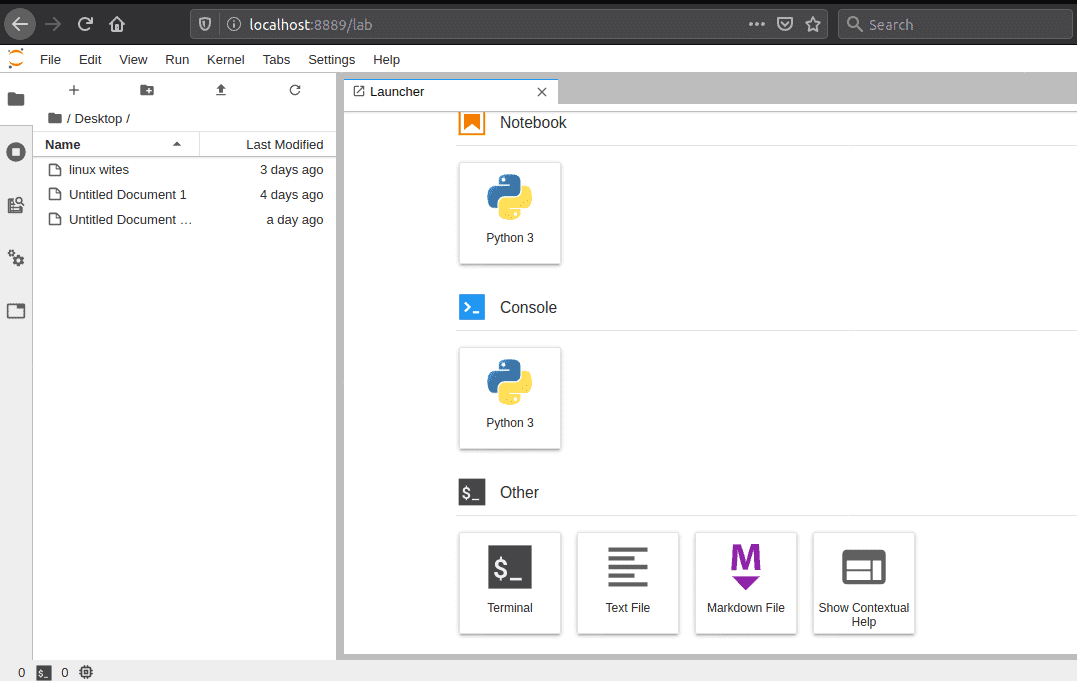
$ jupyter lab
As Jupyter console creates a virtual environment, so the JupyterLab will use the localhost address to link with the web browser. Once the command is run in the terminal, immediately, you will see that JupyterLab is opened in your web browser.
Final Thought
For professional Python user’s it was very confusing which Python console should they use. Before the Anaconda Navigator and JupyterLab were created, programmers used to write Python in terminal and shell scripts. But currently in Linux, Anaconda Navigator and JupyterLab are the most used Python interpreters. In this post, we have seen how to install Anaconda Navigator and JupyterLab in Linux using pipenv and pip shell commands.
It is said that in the future, Python will lead the world of programming language. If you are a Python programmer or want to enter into the world of programming language with Python, I hope this post will be helpful for you to choose the best Python interpreter. If you love this post, don’t forget to share this post on your social accounts.