
If you have been looking for something bigger cloud storage with limitless access and synchronization, I must say the Nextcloud is there for you. Crawling from one cloud storage to another cloud storage would be much more painful and a waste of time. So moving on to the Nextcloud from other cloud storage is definitely a big hyper dive. Nextcloud offers you the best cloud storage sharing system among all your smart devices. Getting Nextcloud is not a very difficult job on Ubuntu Linux. All you need is just fulfill some software requirements.
Nextcloud on Ubuntu Linux
We know that most of the servers are run on the Ubuntu Apache system over the world. So, getting your own cloud server is actually a big step to enter the server world. You can use your own hardware system as the hosting device, or you can buy a hosting package from the top class hosting providers.
Hence, in this post, we are going to see how to download and install the NextCloud on Ubuntu. And, of course, we will be using the localhost service to host all the setup. Once you have done installing the NextCloud, you will get a log in page where you can log in and use the cloud service. You can also use the mobile app for the NextCloud.
Step 1: Get the Ubuntu System Updated
Both the Apache and PHP require the files to get updates at the system repository of Ubuntu. Moreover, Ubuntu updates make the system more functional and more active. It also installs the latest security guards, Kernel and firmware. So, in the beginning, we are going to update our Ubuntu system.
$ sudo apt update -y && sudo apt upgrade -y
You can also check if there is any package available that would get upgraded.
$ sudo apt list --upgradeable
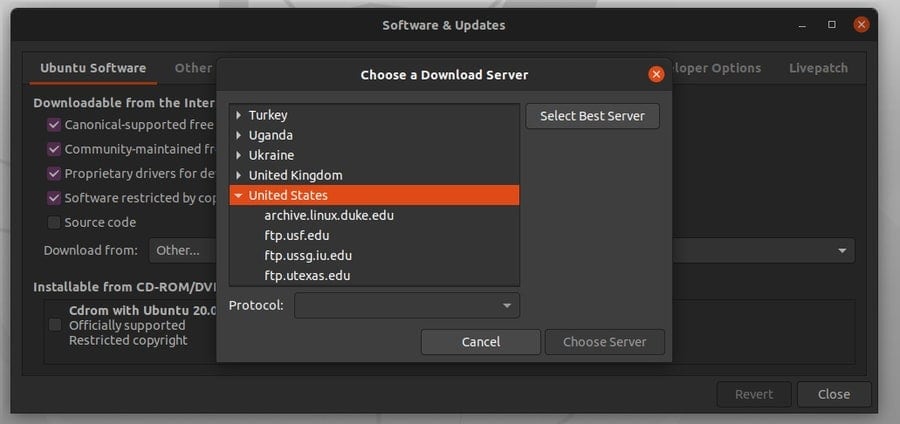
Besides these, you can choose the fastest and best repository server for your locality and check in the Software & Updates’ if an update is available from Ubuntu.
Step 2: Installing PHP and Apache Server on Ubuntu
The Personal Home Page (PHP) language is mostly used for website development and web related works. Here we are dealing with Nextcloud, so we must install the PHP language inside our machine. Then we will also grab and install the Apache server on our Ubuntu machine.
We can either use the Curl library function or directly download the PHP and Apache service form web. Here, I am going to introduce how to use the curl library command line to install PHP and Apache Server. You should get started by installing the Curl first on your Ubuntu.
$ sudo apt install curl
Then add the PHP extension community library in your Ubuntu system.
$ sudo add-apt-repository ppa:ondrej/php
We are going to install and use the LAMP (Linux, Apache, MySQL, and PHP) package on our Ubuntu system to get started with the Nextcloud. For that, we will now install the PHP and the Apache server. Next, we will find out how to get the MySQL service with MariaDB.
$ sudo apt install apache2 libapache2-mod-php7.2 openssl php-imagick php7.2-common php7.2-curl php7.2-gd php7.2-imap php7.2-intl php7.2-json php7.2-ldap php7.2-mbstring php7.2-mysql php7.2-pgsql php-smbclient php-ssh2 php7.2-sqlite3 php7.2-xml php7.2-zip
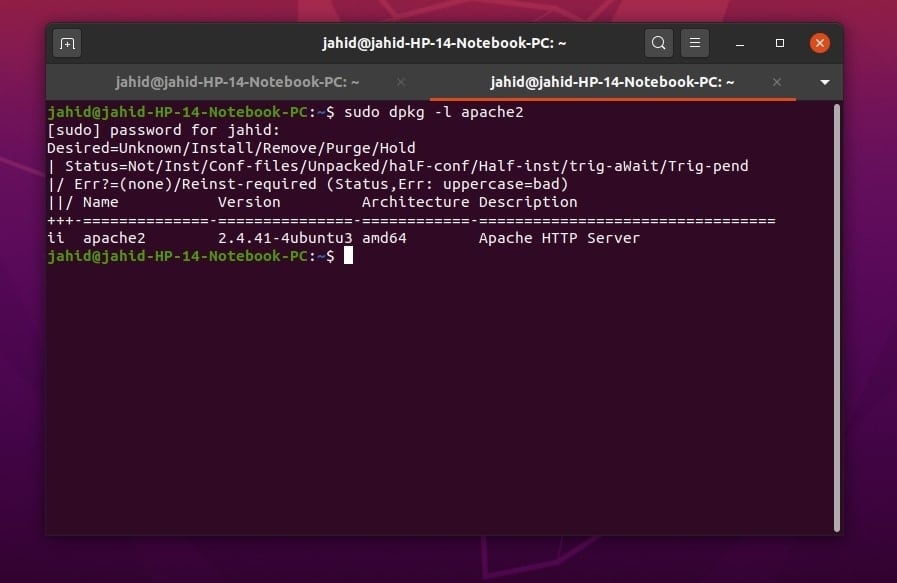
Till now, we have done installing the Apache server and PHP successfully in our Ubuntu system. You can check the PHP version to make sure that PHP is functioning perfectly. You can also find whether the Apache server is responding or not.
$ php -v
$ sudo dpkg -l apache2
Now we will be using some primary Apache server commands to test and enable the Apache server on the Ubuntu platform.
$ sudo systemctl status apache2
$ sudo systemctl start apache2
$ sudo systemctl enable apache2
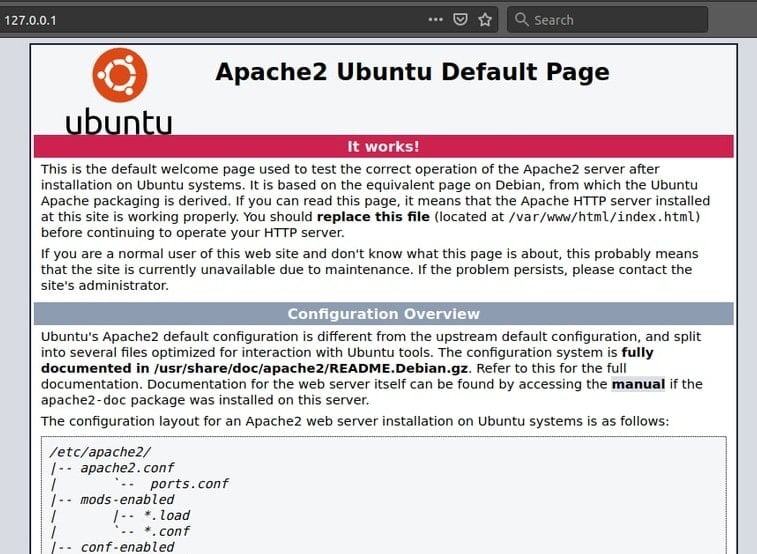
I hope the Apache server and PHP is now installed and running inside your Ubuntu machine. Now it’s time to have a test drive. We can always perform the Welcome page test to ensure if the Apache server is functioning or not. As we already know, the Apache server is installed in the localhost, so, we may hope that we will find our server at the localhost (127.0.0.1) address. You can also check your localhost and other IP addresses using the basic net tool ifconfig command.
$ sudo apt-get install -y net-tools
$ ifconfig
Now, let’s go to the web browser and type localhost at the address bar and hit the Enter. If the Apache Ubuntu Default Page appears, congratulations! You’ve successfully installed the Apache server on your Ubuntu system.
Step 3: Installing and Configuring MariaDB for Nextcloud
Every cloud storage system or website needs to have a database system well established to maintain the data of that server. We are going to use the MySQL language, and for the database engines, we are now going to install the MariaDB server on our Ubuntu. MariaDB server will give us access to do some structured query language.
$ sudo apt install mariadb-server
To change the MariaDB server script, we can use the following terminal command on Ubuntu. This will give us the root access to the MySQL database engine. Although if you are a fan of PostgreSQL, don’t worry, you can always change the DB engine once the Nextcloud is installed.
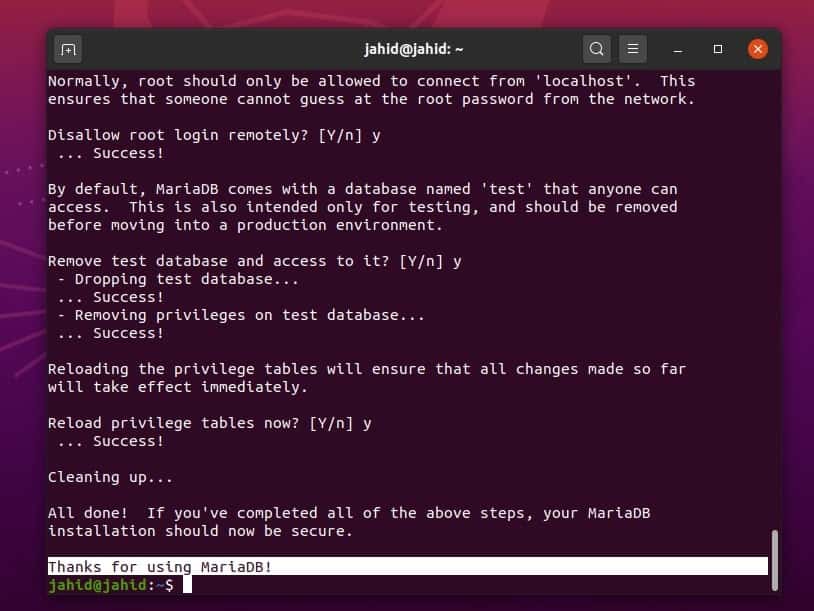
If you have a fresh MariaDB server installed on your machine, your current password must be blank; you just need to put your system root password. Then you can change the database password, allow or remove any existing user from the database engine, and remove the test database from your database engine.
$ sudo mysql_secure_installation
I assume you know a little SQL that is required to set up the database for Nextcloud on Ubuntu. So now, we are going to create a database for the Nextcloud service. We will use very few primary SQL commands and syntaxes to create the database. Here we are creating a database named ubuntupit which is identified by 1234.
$ sudo mysql -u root -p
CREATE DATABASE nextcloud_db;
GRANT ALL ON nextcloud_db.* TO 'ubuntupit'@localhost IDENTIFIED BY '1234';
FLUSH PRIVILEGES;
EXIT;
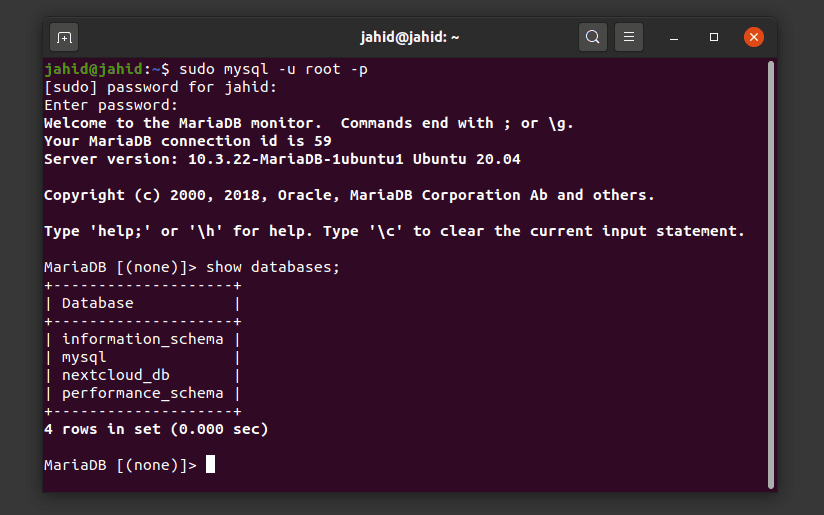
To check, whether the database is created successfully or not, you can always use the show database syntax in the terminal.
$ sudo mysql -u root -p
$ show databases;
Here are some primary MariaDB command lines to enable, disable, and check the MariaDB service status.
$ sudo systemctl stop mariadb.service
$ sudo systemctl start mariadb.service
$ sudo systemctl enable mariadb.service
Step 4: Downloading and Installing Nextcloud on Ubuntu
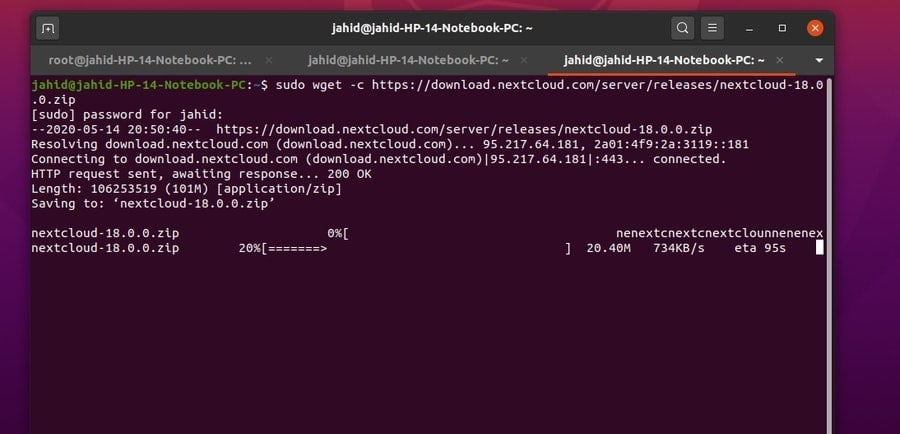
Downloading the Nextcloud is almost an easy process. You just need to download the compressed version of the Nextcloud on your Ubuntu machine. Then you have to unzip the compressed file into the particular /var/www/html/nextcloud directory. You can use the wget commands to download the zipped Nextcloud. If you find any difficulties to unzip the file into the following directory, you might need to change the root permission of that exact directory. You can use the chown command to change the path permission.
$ sudo wget -c https://download.nextcloud.com/server/releases/nextcloud-18.0.0.zip
$ sudo unzip nextcloud-18.0.0.zip
$ sudo cp -r nextcloud /var/www/html/
$ sudo chown -R www-data:www-data /var/www/html/nextcloud
Now, after downloading and extracting the Nextcloud file, you need to edit the Nextcloud configuration script file to get configured with the Apache server and PHP. Using the Vim or Nano script editor is recommended to edit the nextcloud.conf file. If you don’t have the Vim installed inside your Ubuntu machine, just install it.
$ sudo apt-get install vim
$ vi --version
Now open the Nextcloud configuration script with Vim editor.
$ sudo vim /etc/apache2/sites-available/nextcloud.conf
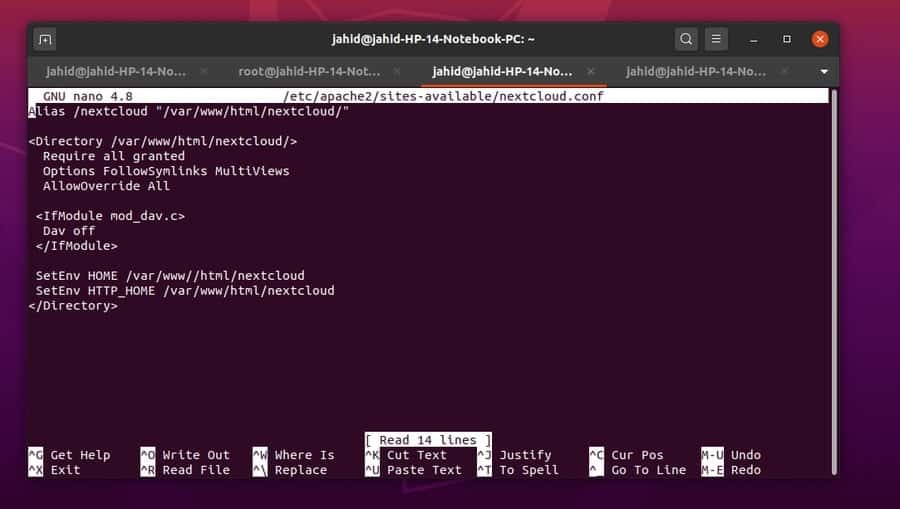
Add the following script inside your Nextcloud configuration script. You can just copy and pest the script, then save and exit the editor.
Alias /nextcloud "/var/www/html/nextcloud/"

<Directory /var/www/html/nextcloud/>
Require all granted
Options FollowSymlinks MultiViews
AllowOverride All

<IfModule mod_dav.c>
Dav off
</IfModule>

SetEnv HOME /var/www//html/nextcloud
SetEnv HTTP_HOME /var/www/html/nextcloud
</Directory>
To enable the Virtual host that we have just added inside the Apache script, we need to use the a2ensite command for the Nextcloud configuration. Then we will also need to rewrite the scripted file and set up the Apache environment for the Nextcloud service.
$ sudo a2ensite nextcloud.conf
$ sudo a2enmod rewrite
$ sudo a2enmod headers
$ sudo a2enmod env
$ sudo a2enmod dir
$ sudo a2enmod mime
Now after everything is done, you need to restart the Apache server so that the PHP and Apache server can function with newly configured settings properly.
$ sudo systemctl restart apache2
Step 5: Getting Firewall Security Access
A firewall is the computer network security system that can allow or deny any IP address to get access from your Ubuntu machine. As we are using the localhost address to run our Nextcloud on Ubuntu, so we hope that the firewall will not become an issue. Furthermore, it’s safe to check the firewall status and enable it for your Nextcloud.
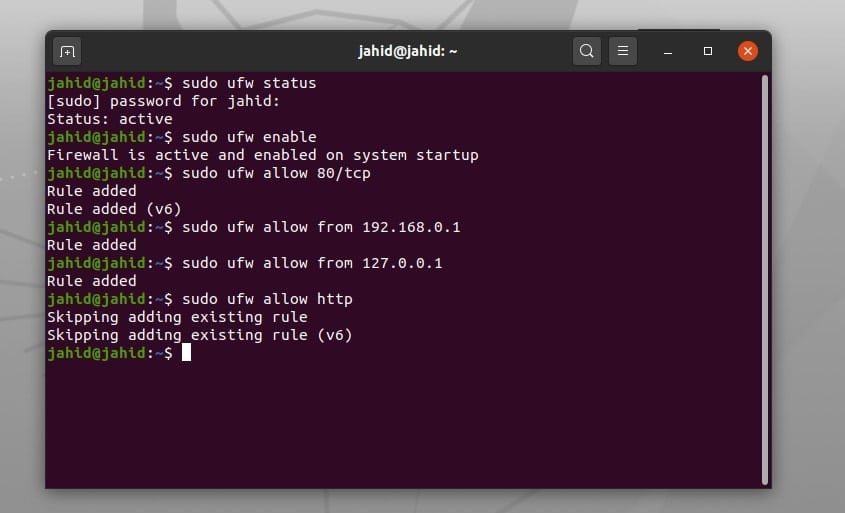
$ sudo ufw enable
$ sudo ufw status
If your Nextcloud is hosted somewhere else, you can make the firewall access for that particular IP and port.
$ sudo ufw allow 80/tcp
$ sudo ufw allow from 192.168.0.1
To get the firewall access for all the HTTP websites, you can use the allow http command in the terminal.
$ sudo ufw allow http
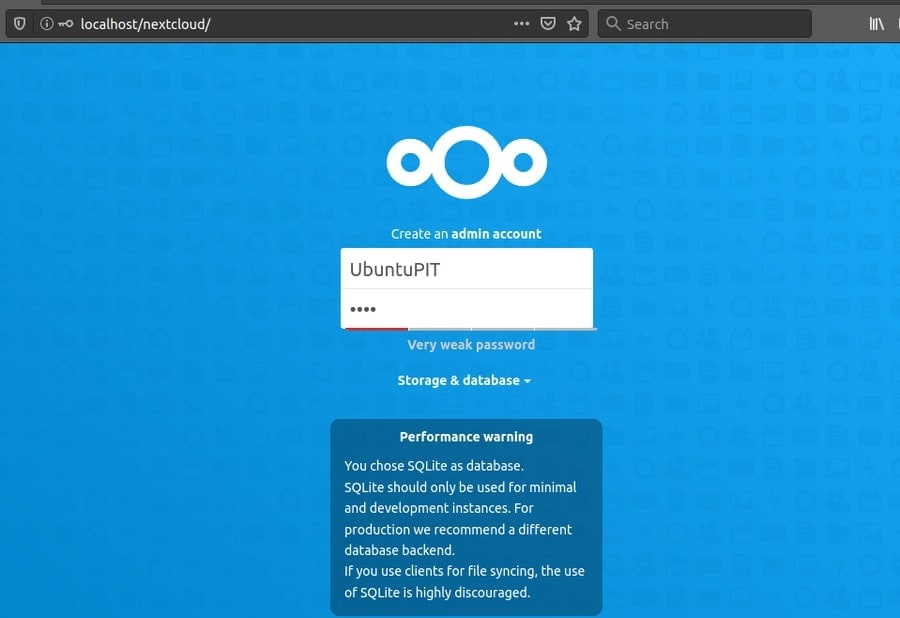
Step 6: Getting Started with the Nextcloud on Ubuntu
This is the final step to get started with the Nextcloud service. As far as we have done, all the installation and configuration processes are done. Now you can open your web browser and type the localhost address, then add a forward slash / and type, nextcloud. There you go! Your Nextcloud client is running. Here you will find some basic setup processes that you need to fulfill. All the steps are easy and self-explanatory.
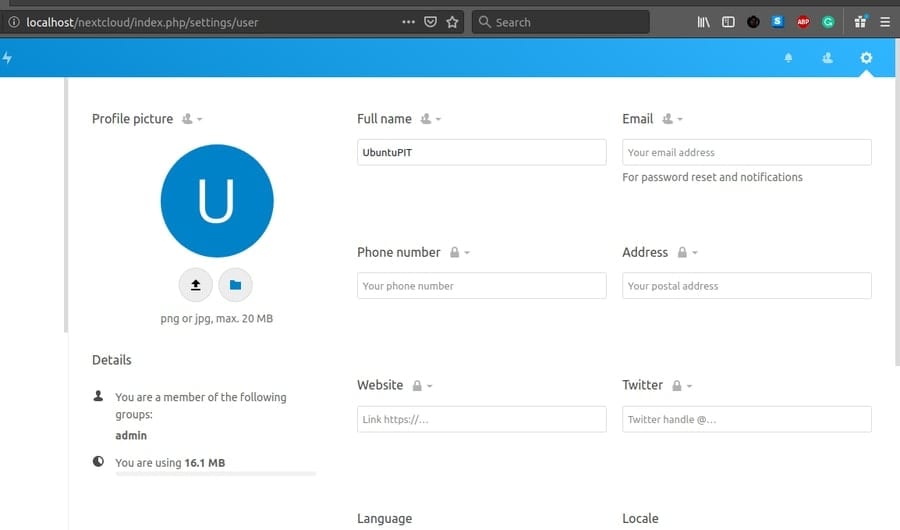
Now after the setup is done, you will be redirected to the login page. Here you have to enter the username and the password that you have generated previously. You can also share your Nextcloud address with others if you have a public accessible hosting service. Here, I am giving my web address of Nextcloud service for better understanding.
UbuntuPIT@localhost/nextcloud
The Nextcloud Hub
Here, we are at the very ending of this post; we got the NextCloud Hub. The NextCloud Hub is something where you can upload, download, and share your files. You can share files with multiple users at the same time with the help of NextCloud Hub. You will be able to find the grid and list view of all your files in the Hub. Moreover, you will find a chat room where you can chat with your clients and others.
Here, some key features are listed down of the Nextcloud-Hub:
- Cloud Talk and Chat
- Allow users to share internal storage
- Grid and list view of files and folders
- Cross-platform software
- Smooth e-mail service
- Nextcloud contact list
- Full-featured office suite
- Data encryption
- Two-factor authentication
Removing or Resetting the Nextcloud on Ubuntu
Sometime you might need to uninstall or reinstall the Nextcloud service from your Ubuntu Linux machine. It is more way easy and simple to remove the Nextcloud than installing it. All you need is to just need to delete the database from your cloud storage setting page and delete the directory where you’ve installed the Nextcloud services. In my case, the directory or the path is /var/www/html/nextcloud.
If you had installed the Nextcloud using the Snap Store, you might use the following snap remove command in your terminal command line.
$ sudo snap remove nextcloud
To reset the Nextcloud settings on Ubuntu, you can use this terminal command line.
$ sudo -u www-data php /var/www/html/nextcloud/occ user:resetpassword admin
Final Thoughts
Nextcloud is an open-source service, so all the controls are in your hand. All the files are secure and protected in the NextCloud. You can lock the privacy system of files from the NextCloud Hub. In this post, we have discussed the installation process and the primary features of NextCloud.
So, what do you think about the NextCloud service? Let us know if you have been using the service before, and how is your experience. You can write any comments related to this post in the comment section. Also, share this post on your social media.
Hi Jahid, nice tutorial, I have followed similar ones but had problems with ‘Port-Forwarding’ through my router. Also you don’t say which ‘versions’ of Ubuntu or Nextcloud this applies to, maybe you could elaborate. Look forward to your other tutorials.
This didn’t work for me and I have no idea what I’ve done. I’m at the localhost/nextcloud step, it just takes me to a page with a bunch of text. Should I uninstall everything and start over? How do I do it? Where can I see it? Isn’t there a way to just download Nextcloud and enter your username and password, like on other operating systems?