
Jitsi Meet is an online video calling and conferencing package that you can install and use on Ubuntu Linux. You can host a video conference and telecast it live on your Youtube channel. Though some other popular video conferencing applications are available on the internet, the reason you would use the Jitsi Meet is that there are some extra features on Jitsi Meet that are not available in other video conference applications. Moreover, Jitsi Meet is wholly encrypted with end to end encryption. Installing and using Jitsi Meet is entirely safe on your Ubuntu machine.
Jitsi Meet on Ubuntu Linux
By visiting the web interface of the Jitsi Meet, you can use most of the features of Jitsi Meet without installing it on your Ubuntu machine. But you might install the application on your Ubuntu to get command over all the features and tools. With a little webserver knowledge, you can set up and host your own Jitsi Meet server on your Ubuntu machine.
Hosting a Jitsi server doesn’t require the subscription to any premium hosting packages. You can host your Jitsi Meet on your localhost server. Even if you have any cloud server facilities, you can also install the Jitsi Meet on your cloud server.
You must know that you can’t see where the server is hosted and how your data is protected from data leakage in most of the video conversation applications. But this time, the Jitsi Meet has given you full control of your data. You can host your own Jitsi server where all your personal data, calling data, multimedia data, and other files are uploaded to your own private server.
Jitsi Meet has developed many features for its users; a few of them are listed below. In this post, we will see how to prepare a Ubuntu machine for the Jitsi server and how to install the Jitsi Meet on Ubuntu Linux.
- Allows More Than 100 Participants
- Youtube Live Stream Support
- Manage Video Quality
- Host Free Webinar
- Support Browser Interface
- Password Security
- Toggle View
- Blur Background
- Speaker Stats
- Chat Box
Step 1: Set the Hostname of Your Linux Machine
Jitsi Meet requires a host to store data. As you are using an open-source package, you need to configure a server to host the Jitsi Meet. You will be glad to know that you can host the Jitsi Meet on your local Nginx or Apache server if you want.
But in this case, I am simply converting my local Ubuntu machine into a host server. As we all know, the Ubuntu machine can perform as a host server; all we need is a little push to make the server functional. Here, we will change the hostname of our Ubuntu machine and rename the hostname with the Jitsi. You can change the hostname according to your machine’s name.
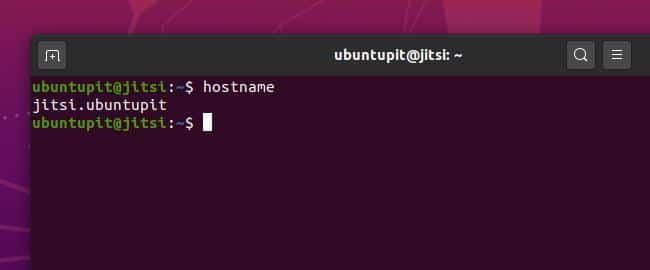
Use the following hostnamectl command to replace the hostname. Later you can check the hostname to confirm whether it has changed or not.
sudo hostnamectl set-hostname jitsi.ubuntupit
hostname
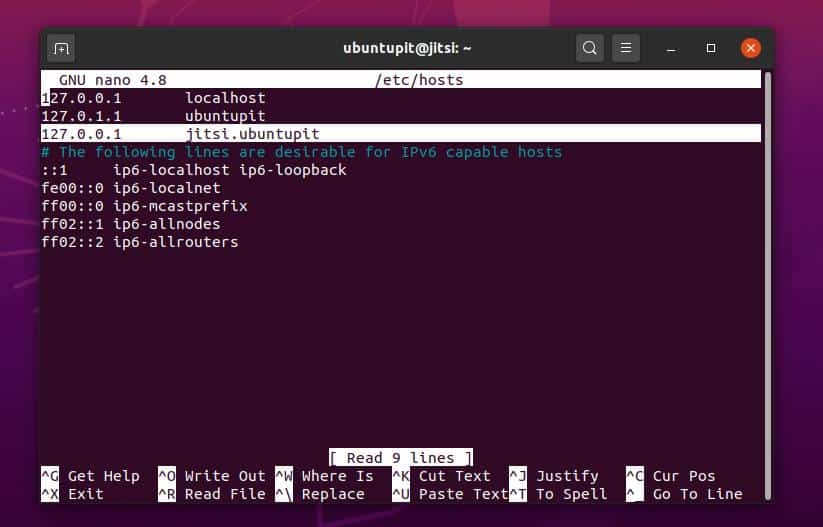
Now open the configuration script of your Ubuntu hosts to attach your Jitsi Meet domain with the localhost address. You can use the following terminal command to edit and add the address line inside the host configuration script.
sudo nano /etc/hosts
127.0.0.1      jitsi.ubuntupit
Step 2: Set Up Firewall Configuration
In this step, we will learn how to configure the firewall settings for the Jitsi Meet server. Suppose you are using the Uncomplicated Firewall settings on your Ubuntu machine. In that case, you can follow the terminal command-lines given below to allow the TCP, UDP, HHTP settings for your Jitsi Server. By default, Jitsi Meet uses the following network ports. Try to make the ports open and free. Otherwise, you have to reconfigure the network settings on Jitsi Meet.
- 80 TCP (HTTP)
- 443 TCP (HTTPS)
- 10000 – 20000 (UDP)
sudo ufw allow 80/tcp
sudo ufw allow 443/tcp
sudo ufw allow 4443/tcp
sudo ufw allow 10000/udp
sudo ufw allow in ssh
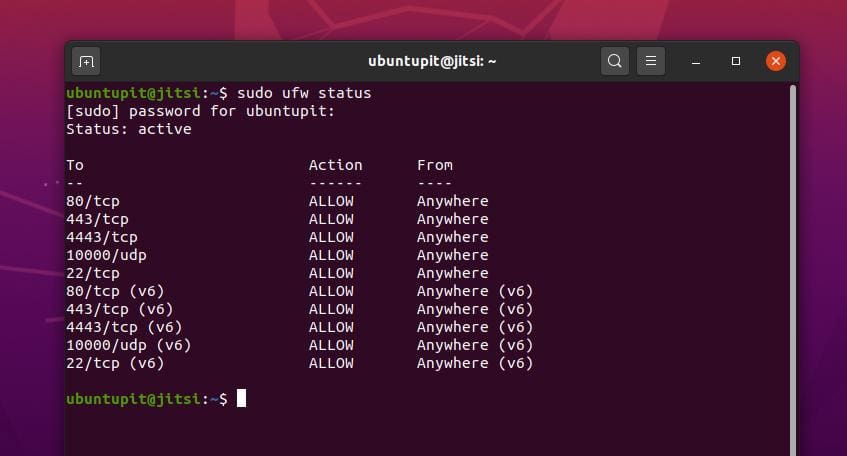
Now you can reload and check the firewall status on your Ubuntu machine.
sudo ufw reload
sudo ufw status
Step 3: Download and Install Jitsi Meet on Ubuntu
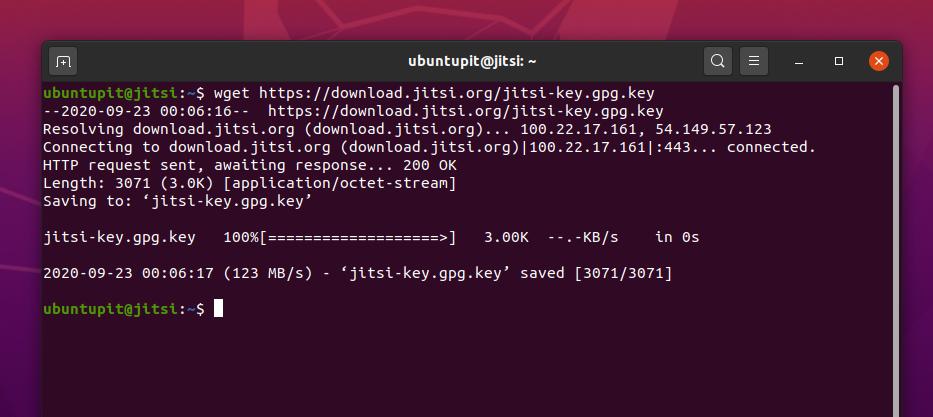
To install the Jitsi tool inside your Ubuntu machine, first, you need to add the GNU Privacy Guard (GPG) key to your system. The GPG key will make your conversations, calls, and other media files encrypted in your server. Use the following wget terminal command-line to download the GPG key on your machine.
wget https://download.jitsi.org/jitsi-key.gpg.key
The download won’t take so long. After the download is finished, add the GPG key to your Jitsi package extension. After the key is added to the Jitsi package, you can remove the GPG key.
sudo apt-key add jitsi-key.gpg.key
rm jitsi-key.gpg.key
Now you need to edit the source list of the Jitsi host server to add the installation package inside the host server. Use the terminal command given below to edit the Jitsi source list. After that, add the Debian download URL inside the script. Then save and exit the script.
sudo nano /etc/apt/sources.list.d/jitsi-stable.list
Add this line to the file for the Jitsi repository.
deb https://download.jitsi.org stable/
After all the processes are done, update your system repository. Then install the Jitsi Meet package on your Ubuntu system. Jitsi Meet will automatically download and install additional Java and Python dependencies inside your machine.
sudo apt update
sudo apt install jitsi-meet
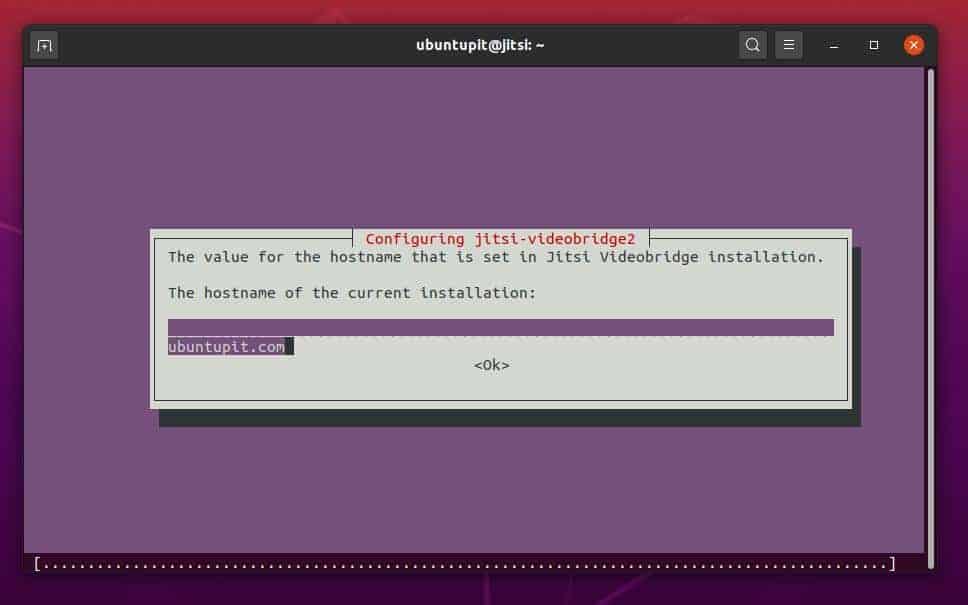
In the installation process, you will be asked to add your hostname. Type your Jitsi hostname that we set previously, and hit the OK button.
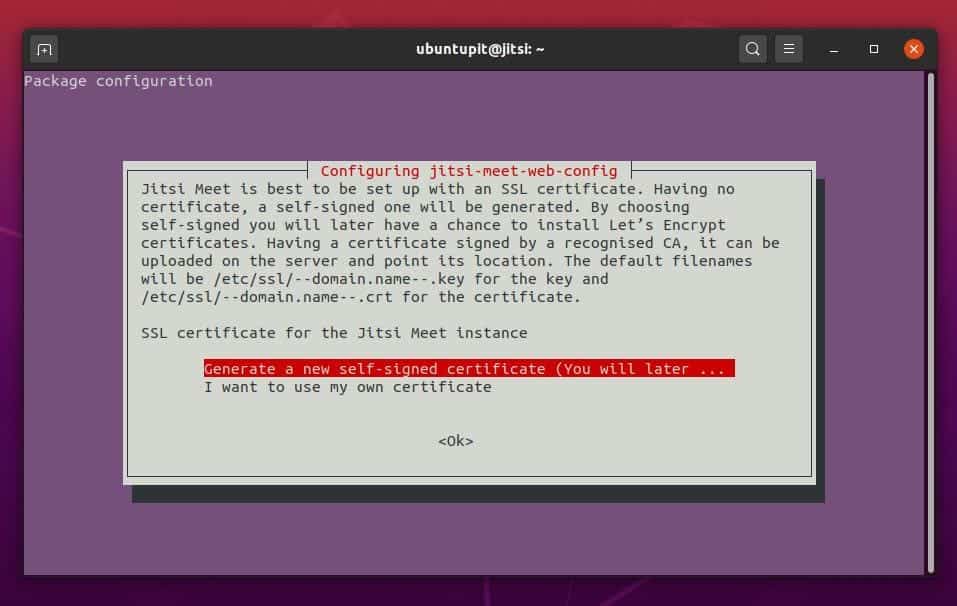
After a while, you will be asked to choose an SSL certification method for the Jitsi Meet services. You can select the ‘Generate a new self-signed certificate’ option to complete the process later. Or, if you have an SSL certificate, you can use that too.
Step 4: Generate Self CSR for Jitsi Meet
As we have skipped the SSL certification step, now we will generate a self-signed certificate request for the Jitsi Meet. Then we will redirect the HTTP address of Jitsi to HTTPS. To add a self-signed certificate key, first, you need to install the Certbot free SSL certificate. If you have an Apache and Nginx web server, you can install the Certbot certificate for those servers too.
Add a Certbot key in the system repository in your Ubuntu machine. Then install the Certbot tool. As I already have an Nginx server installed, I will be configuring the Certbot certificate on my existing server.
sudo add-apt-repository ppa:certbot/certbot
sudo apt install certbot
Now, use the Nano text editor tool to edit the Certbot script file for Jitsi Meet on Ubuntu. You have to find the following line inside the script and replace it with certbot. Use this command-line to open the Jitsi script file.
sudo nano /usr/share/jitsi-meet/scripts/install-letsencrypt-cert.sh
Now find the following line.
./certbot-auto
Replace certbot with the following line.
certbot
After the Certbot configuration script is updated, you can now run the letsencrypt command to finish the SSL installation process for your Jitsi Meet on Ubuntu. I may note that sometimes the Certbot method would not work for the latest Ubuntu 20.04 LTS Focal Fossa. In that case, you can follow the alternative methods of generating a certificate signing request from Linux.
sudo /usr/share/jitsi-meet/scripts/install-letsencrypt-cert.sh
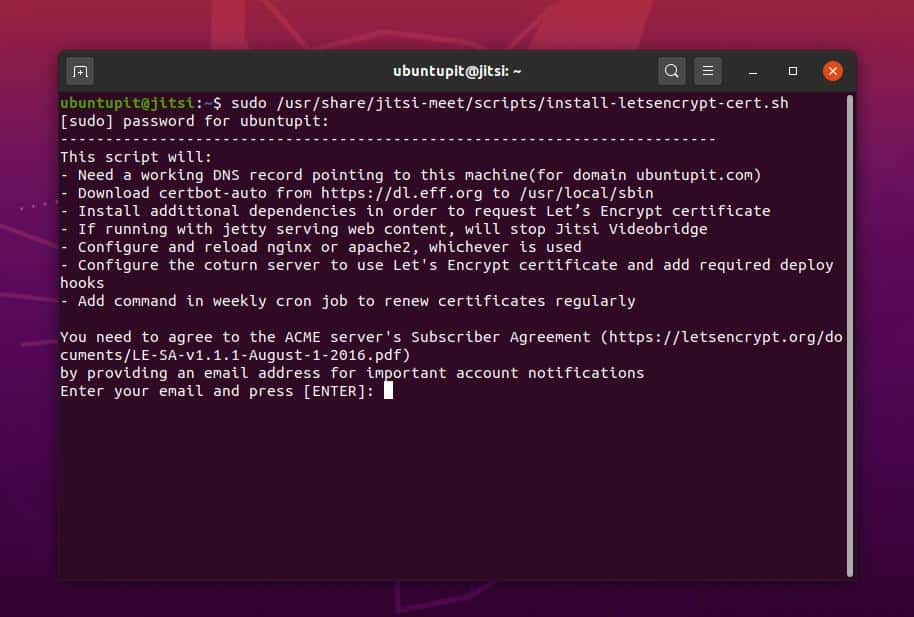
Now finish your encryption process by entering necessary pieces of information about your domain. You must enter a valid e-mail address when asked.
Step 5: Use Jitsi Meet on Ubuntu
Till now, we have learned how to install the Jitsi Meet and how to make it secure by enabling the HTTPS redirection. Now we will load the web address of our Jitsi Meet in the address bar of our web browser. You must remember that previously we had set a hostname and assigned it against the localhost address.
So, we are now ready to enter the Jitsi server from the web browser. You need to enter the Jitsi address in the address bar and hit the Enter button. The URL of the Jitsi Meet will be similar as I kept mine below. However, you can change the URL and replace it with a custom domain.
https://jitsi.ubuntupit/
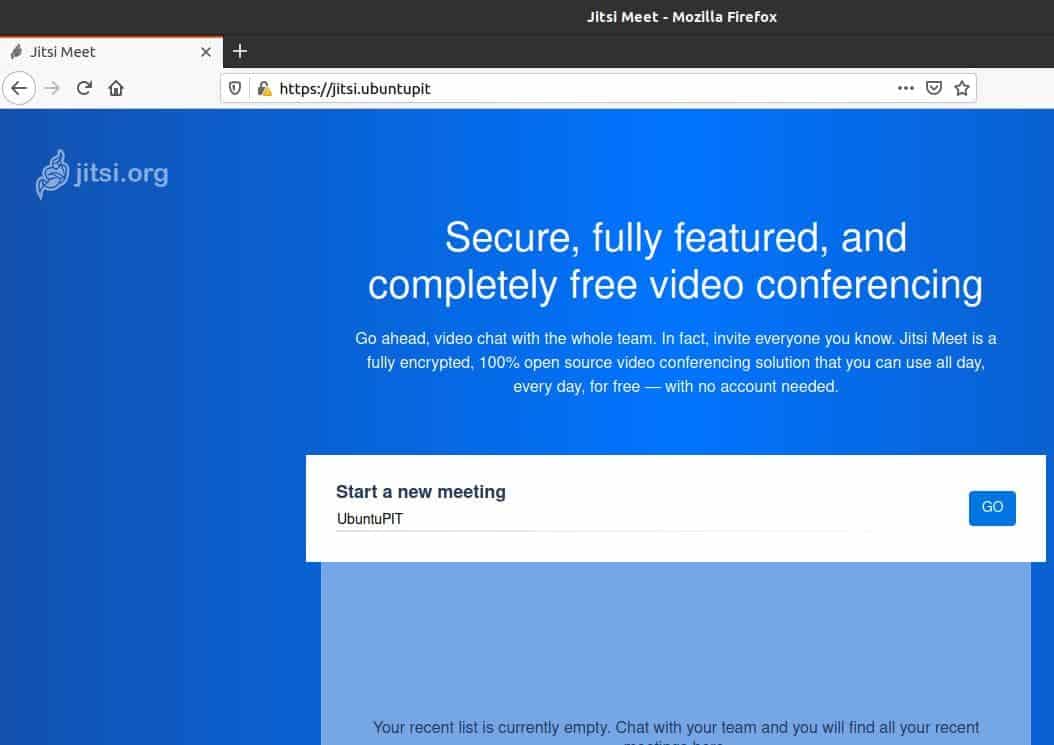
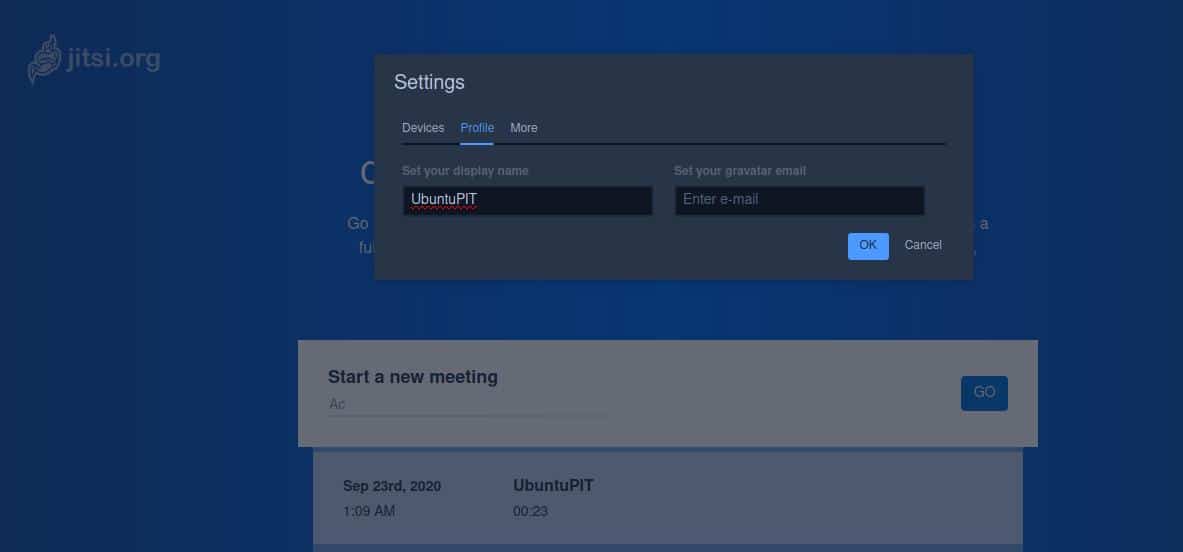
At the starting of the Jitsi Meet, you will be asked to give your hosting server the name. You just need to put your name and hit the Go button. Then you can do the other setting options to complete the configuration of the Jitsi Meet.
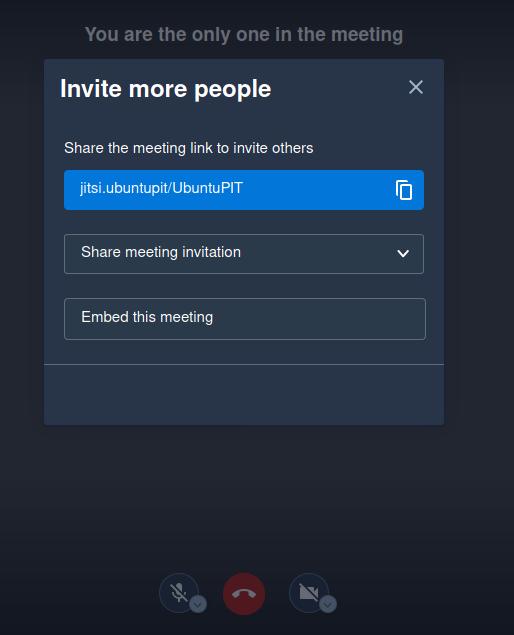
After settings up the Jitsi Meet, you can now start a new meeting and share the meeting with your friend and colleagues. At the left bottom corner of Jitsi Meet, you will find a few regulatory options to manage video quality, view full screen, share a youtube video, and monitor the speaker stats.
Using Jitsi Meet on Ubuntu Linux is a very straightforward process. You do not need to have any previous networking or server management experiences. Even when you are away from your hosting PC, you can control your Jitsi Meet account from your smart devices too.
Step 6: Remove Jitsi Meet from Ubuntu
If you change the hosting server of your Jitsi Meet, you may need to rename the hostname and reconfigure the entire settings of the Jitsi server. However, you can remove the Jitsi Meet from your local server and make a clean installation on your new hosting server. Removing the Jitsi Meet from Ubuntu or Linux distributions is not a complicated task. You can use the following terminal command-lines to remove the Jitsi Meet from your Ubuntu machine.
sudo apt-get remove jitsi
sudo apt-get autoremove jitsi
sudo apt-get purge jitsi-meet
Extra Tip: Using a Sub-Domain for Jitsi Meet
I must note that if you have any domain address, you can skip the hostname changing on your local machine and set up a Jitsi sub-domain to live your Jitsi server. However, the process of setting up a Jitsi sub-domain is not a very simple task to do. You need to configure a Domain Name Server (DNS) record and assign it to your hosting service. Be mindful, to add a domain or sub-domain for your Jitsi Meet; you need to have a public hosting service.
Final Words
I must mention that, if you want to use the Jitsi Meet services through a browser interface instead of installing it on your Ubuntu machine, you might get some dealy sound and other crush issues. Moreover, using the Jitsi Meet on another third party hosting server is not the true purpose of using the Jitsi Meet. After considering all consequences, you can’t disagree that installing the Jitsi Meet on your ubuntu Linux is the best way to make your call and conversations private and secure.
In the entire post, I have described the fundamental topics of Jitsi hosting services. I have also illustrated the clear concept of how to install the Jitsi Meet on your Ubuntu machine. If you find this post useful and handy, please share it with your friends and Linux community. We also encourage you to write down your opinions regarding this post in the comment section.
Great article. I do have a question. With Step 1, is it necessary to change the hostname with the Jitsi prefix? I can use my own hostname that I have already preset when I set my my local Ubuntu machine?
Thank you for your query. I already mentioned the answer of your question inside the ‘Extra Tip’ section. Chaing the hostname of your PC is not mandatory. I have changed the hostname for the better understanding of our readers who are new to Linux. However, If you already have a hosting platform, you can live your Jitsi Meet on that location.