In Linux, the chown command is used to change the ownership of a file or a directory with another user in the system. The full meaning of the chown command is to change ownership. The chown command can be applied to a file or directory as a soft or hard link in the Linux file system. In every Linux operating system, each file is associated with an owner of a group. If you are not the particular owner who created or modified the file, you cannot change or modify that file from another user account. But with the help of the chown command, you can easily get access to a directory or a file that you want to modify.
The basic syntaxes and synopsis of the chown command are easy to understand. The developers had built this command so that anyone could easily understand the commands and the language.
The chown command is categorized under the user list. If you make a list in which category this command would go, then it would definitely go under the user category where you can define your users for specific directory access, or you can play an admin role to give access to different directories to your user.
The chown command becomes very efficient and beneficial in a multi-user-based operating system or server. If you are a Linux system administrator, you might need to know the basic concept of the chown command and the practical use case to make your journey smooth.
Importance of chown Command
Knowing the details about the chown command in Linux is important because the users can play a vital role in changing the ownership of a directory and accessing the files. So you need to know how to get access and change the access to a directory when you do a server-level administrative task.
If you are an expert Linux user and have been using this for a while, you might have heard about the chgrp command to change the group ownership of a file or directory. Actually, the chgrp command is a legacy command of the chown command for Linux and Unix-based systems.
Another advantage of knowing about the chown command is in handing over the ownership. For instance, let’s say that you have been working on a project, and now you want to hand over your project to another user or add another member to your project.
So typically, what you would do is either change the directory of your folder, or you would copy the entire file to a new folder. But, with the chown command, you can add new members to your project with full edit access. The same procedure is also applicable if you want to revoke the permission of an existing user on your directory or your project.
chown Command in Linux: Permission Details
When we are talking about changing the ownership of a file, we are talking about the read-write and the execution permission as well. You can also execute the chown command in Linux for different user groups or other people on your system.
Here you can see the basic format of the chown command on Linux. Now we will see a brief explanation of this below-mentioned command format so that you can use it on your terminal shell.
–rw-r–r– file and drwxr-xr-x directory permission explained
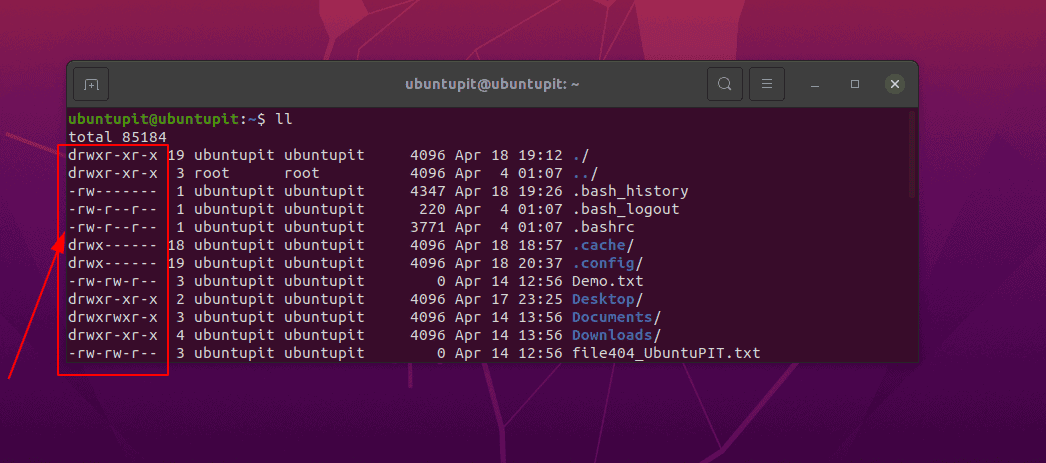
Here is the description of the characters that have been used in the above command.
-    Regular file.
b    Block file.
c    Character special file.
d    Directory.
l    Symbolic link.
p    FIFO.
s    Socket.
w    Whiteout.
chown Command Syntaxes
Here we will see some syntaxes about the chown command on Linux that will help you understand the command type and format.
- -c, –changes: When making a change, it is used to display the detailed output in a verbose mode.
- -f, –silent, –quiet: The -f flag suppresses error notes.
- -v, –verbose: It shows the results of the commands in verbose mode with additional info.
- –dereference: It shows the differences between files for chown commands to access symbolic links.
- -h, –no-dereference: When you use this, rather than affecting any referenced file, it affects symbolic links.
- –from=CURRENT_OWNER:CURRENT_GROUP: The owner or group of a file can be modified by this command.
- –no-preserve-root: A backslash (‘/’) is not executed individually by this method.
- –preserve-root: We can use this if the chown fails to run recursive operations.
- –reference=RFILE: The reference flag displays the reference between two groups for two owners.
- -R, –recursive: The recursive flag is used to execute multiple operations in the directory and files recursively.
- –help: The help syntax prints all the manual and helping materials for the chown command in Linux.
- –version: chown –version: You can check the version of your current chown command on your system.
Examples of chown Commands on Linux
So far, we have seen the importance and the syntaxes of the chown command on Linux. Now, we will see a few most used examples of the chown commands.
1. Display the UID, GID, and Groups
We can execute any of the below-mentioned commands on a terminal shell to display the User ID and the group ID. Executing these commands will help you to know if they belong to any existing group or not. Letter, you can use those group IDs or group names or owner names to change the current ownership to your desired owner through the chown command in Linux.
$ groups
$ id

2. Display the User and Group Ownership Of a File
To display the current user and the group owner on your Linux, you can execute the following ls command on your terminal shell.
ls -l Demo.txt

3. Change the Owner of a File (Using username)
To change the current owner of a file or a folder in Linux, you can use the below-mentioned chown command on the terminal shell. If you look at the command closely, you will see that this command requires superuser permission. Also, in the formation of this command, you can see that the first part is filled with the user name, and the last part is filled with the file or folder path.
sudo chown <username> <File name>
sudo chown ubuntupit Demo.txt

4. Change the Owner of a File (Using UID)
If you already know the file UID or the group ID of a file, you can also apply the chown command on a Linux system through the UID to change the ownership.
sudo chown 1000 Demo.txt
5. Change the Group of a File
To change the ownership of a group or a file, you can use the below-mentioned chown command on Linux to set the owner.
sudo chown :groupname Demo.txt
sudo chown :GID Demo.txt
sudo chown :ubuntupit Demo.txt

6. Change the User and Group Name
The chown command also allows us to change the user and the group name on the Linux file system. Here, in the formation of this chown command, first, we will need to put the username or the UID, then we need to put the desired group name that ends with the file name.
sudo chown <User name/UID>:<Group name/GID> <File name>
sudo chown ubuntupit:ubuntupit Demo.txt

7. Change the Owner from Particular Ownership
If you need to change the ownership for an item from one specific owner to another particular owner, you just use the chown command given below with two owners’ names.
chown --from=master root ubuntupit
8. Change Group from a Particular Group
In the same way, you can also change the ownership of a group from one owner to another specific owner.
chown --from=:group1 root ubuntupit
9. Copy Ownership of One File to Another
Through the chown command, you can copy and replicate the ownership of a file from one user to another user. In this way, all the existing permissions will be transferred to the new user for that file.
chown --reference=ubuntupit ubuntupit_new
10. Change Ownership of Multiple Files
The below-mentioned command will show how you can change the ownership for multiple files with a single chown command in Linux.
chown master:group ubuntupit2.file ubuntupit3.file
chown ubuntupit:ubuntupit Demo.txt Demo_2.txt

11. Change Group to a Users Login Group
If you need to assign a new user with ownership on your Linux system, you can execute the below-mentioned chown command. While the new user logs on to the system, you can assign the user to access your files through a login.
chown NewUser: FILE
chown ubuntupit: sample
12. Transfer Ownership and Group Settings from One File to Another
To hand over the ownership and change the group ownership settings on Linux, you can run the below-mentioned chown command on your shell to set all these ownership and group settings from one file to another.
chown --reference=file1 file2
13. Check Owner and Group Before Making Changes
The chown command with a double dash (–) syntax lets you verify the current owner and group and then apply changes. The first one is a command format, and the second one is a chown example for Linux.
chown --from=CurrentUser:CurrentGroup NewUser:NewGroup FILE
chown --from=root:group2 ubuntupit:group3 sample3
14. Check The Owner Only
Apart from changing the ownership, you can also see who the current owner of a file is on Linux. This will help you execute chown commands if you have a multi-user-based server or system.
chown --from=CurrentUser NewUser FILE
chown --from=ubuntupit ubuntupit Demo.txt

15. Recursively Change File Ownership
This one is very important for all Linux system owners and admins. If you need to change or hand over the ownership of a directory along with all the subdirectories, please execute the below-mentioned chown command on your Linux shell.
chown -R NewUser:NewGroup DirNameOrPath
chown -R ubuntupit:group3 Dir1
16. Chown Command and Symbolic Links
The chown command allows the users to execute the command on the soft links or symbolic links as well. Here, the below-mentioned command shows the command formation of the chown command for the symbolic links.
chown -h NewUser:NewGroup SymbolicLink
17. Display Chown Command Process Details
If you want to monitor the progress or the process details of the chown command on your Linux system, please execute the below-mentioned command on the shell.
chown -v ubuntupit Demo.txt

18. Suppress Chown Command Errors
In some cases, the chown command may return with some errors if you execute the wrong command. To avoid or suppress the error during execution, you can use an -f flag with the chown command on the Linux terminal shell.
chown -f NewUser FILE
chown -f ubuntupit Demo.txt

19. GUI Displaying File Permissions
If you’re looking for a graphical user interface-based tool to change the ownership of a file, you can just use the default file manager on your Linux System. The below-mentioned picture shows how you can browse the file and change the file ownership to a specific user or a group.
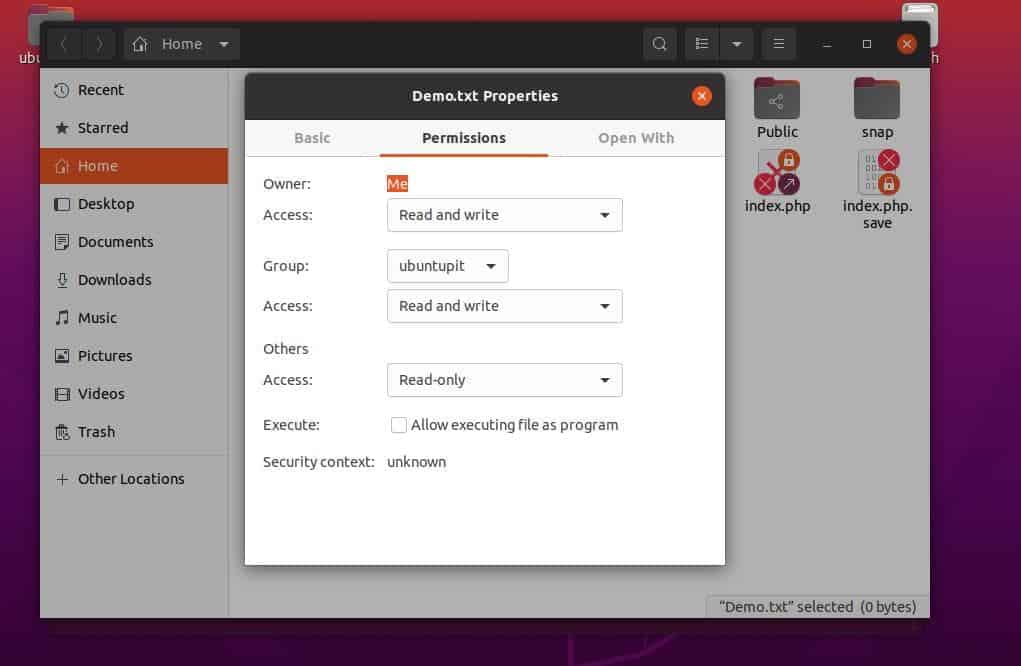
To browse the Permission tab of a file, simply right-click on the file and move to the ‘Permissions’ tab. You can change the read-write access, group access, execution access, and other permissions on this tab.
20. chown: Help
Last but not least, the 20th example of the chown command is the help or the manual command. The help page might be helpful for those who are just new to this command.
chown --help
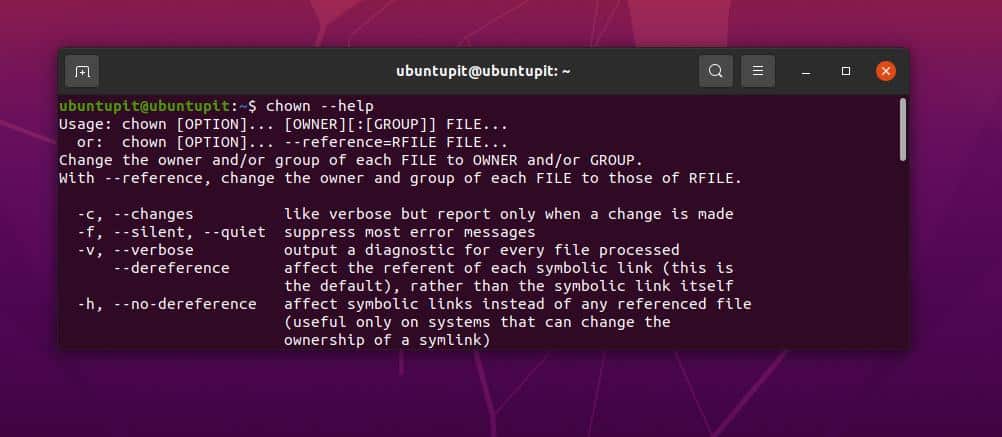
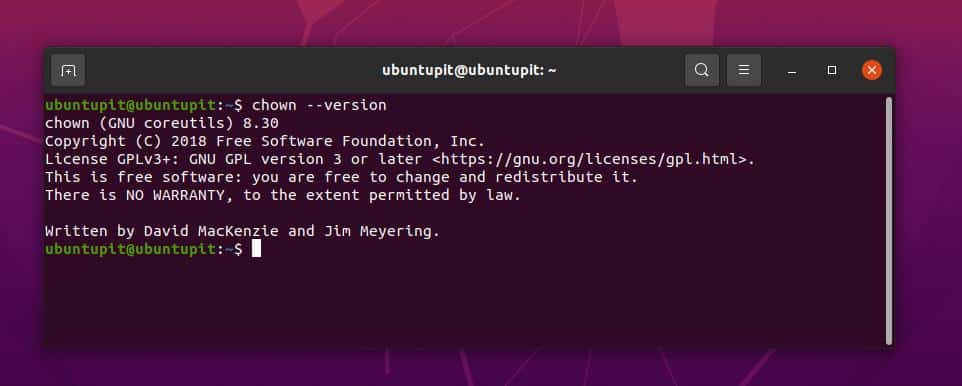
If you face issues with the Chown command, please ensure that you’re using the latest version of the chown command on your Linux machine. The below-mentioned command will display the running version of the change ownership command.
chown --version
Insights!
Using the chown commands is beneficial for system admins. If you’re a newbie on Linux, please execute the commands only if you understand; executing a wrong chown command can hold your read-write access from your own files.
We have seen the notion and most used chown commands on Linux in the entire post. If you need to know the chmod commands, please go through this URL.
If you find this article has been useful for you, please do not forget to share this post with your friends and the Linux community. We also encourage you to write down your opinions in the comment section regarding this article.
