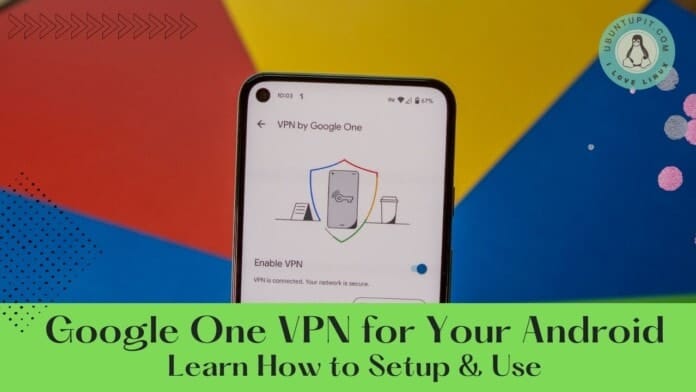
If you’re looking for a good VPN for your Android, then Google One VPN would be the best deal for you as it’s Google authorized. Actually, to become a user of Google VPN, you’ve to purchase a 2TB storage plan of Google, and only this plan’s subscribers can use Google VPN as an extra feature. So, without further delay, be a 2TB storage plan member and get Google One VPN for your Android.
Your Android’s data, photos, and others will be kept safe in Google’s hand. There are many third-party VPNs you may find to use, but those are not secured, and we all know that. To purchase the 2TB storage plan, you’ve to invest $9.99 per month. And the great news is for you that no extra charges need to get the Google One VPN for your Android.
It’s a complementary feature with Google’s 2TB storage plan. Easy to use and the performance of it topnotch. Let’s keep your Android safe and secured with Google One VPN.
Things You’ll Be In Need.
As the title says, Google One VPN for your Android, so you need to have an Android device must. And a Gmail account that needs to be synced with your Android device. And, you’re ready to go.
Google One VPN for Your Android
Suppose you’re in a coffee shop and get a free WiFi connection. What should you do? Definitely, you’ll go with free WiFi rather than cellular data. By doing so, there’s a possibility that you might be getting at risk of being hacked by hackers.
As you’re in a free WiFi, they can easily hack your Android down and get all your important data, photos, and others easily that you don’t want to lose by any means. No worries, it’ll not happen because Google one VPN is there to protect your Android.
We all tend to use several VPNs every now and then. Among them, Google One VPN will undoubtedly stand out for your Android. Google’s service never compromises security.
Therefore, to keep yourself away from this kind of risk, please change your location through VPN so that they won’t cause your Android phone any harm. So, if you’re a person who wants to keep all your Android information secure, then don’t skip a word here.
How To Use Google One VPN
As previously mentioned, you need to subscribe to Google’s 2TB storage tier. After doing so, here’s the process of how you can enable and use Google One VPN on your Android.
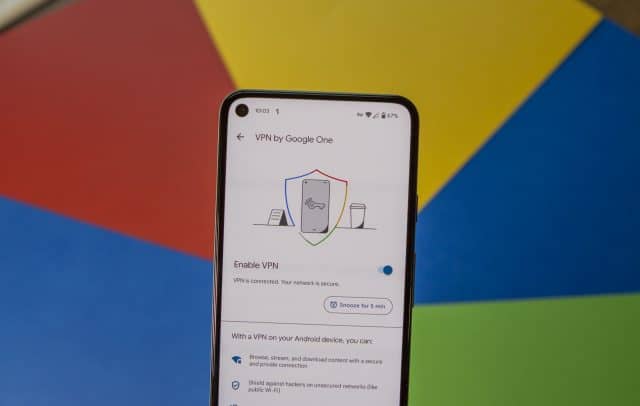
- Let’s begin with opening the Google One app.
- Search for the Benefits button at the bottom and tap.
- Scroll a bit and tap on Online protection with a VPN.
- Enable VPN by swiping the toggle to the right.
- Everything’s done, and you’ll get a confirmation notification “VPN is enabled“.
Furthermore, you’ll find a new Snooze button under google, which you enabled a few minutes ago.
Google One VPN Settings: How to Access Quickly
Since there’s no dedicated app available for Google One VPN on your Android, it would be difficult to enable/disable every time by jumping into an app. Therefore, only one way let for quick access. Set the Google VPN into the quick settings panel so that it can be easily accessible. Let’s see how to:
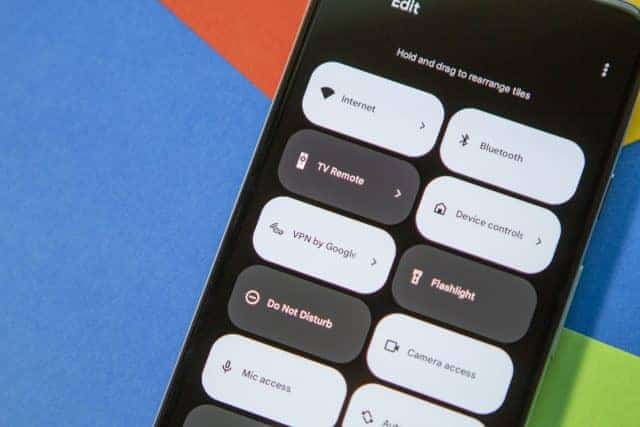
- Swipe down your Android screen for the quick access panel.
- Tap on the edit icon to add new toggles.
- Search until you find your Google One VPN toggle.
- Touch and hold once you find the toggle.
- It’s time to drag and place the toggle where you want at the top toggle list.
From now on, you’ll be able to access your VPN from the quick access panel of your Android device. Say goodbye to jumping on the Google One app every time.
Use Internet Only with VPN Enabled: How and Why
This section may not be applicable to everyone. However, if you’ve children in your house who use your phone, then this section is certainly for you. Set your Google One VPN only to access the internet when your VPN is enabled.
By doing so, you can give your Android to your child without worrying about your security. Simply put, your children will not be able to connect to the internet when VPN is turned off. Let’s see how to:
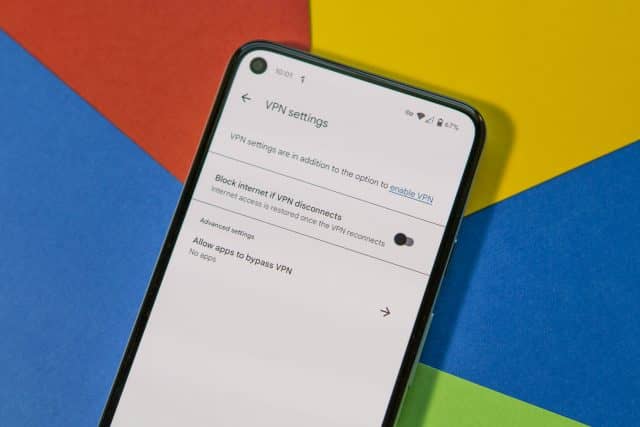
- Tap on the Google One app to open.
- Find Benefits from the bottom toolbar and tap.
- Scroll till you find Online protection with a VPN.
- Now tap on the View Settings.
- Complete the process by tapping Block internet if VPN disconnects.
How to Snooze Google One VPN on Your Android
Do you want to turn off your Google One VPN temporarily and get back activated automatically? Sounds amazing, right? Well, it’s possible; you just need to know some basic guidelines. Let’s see:
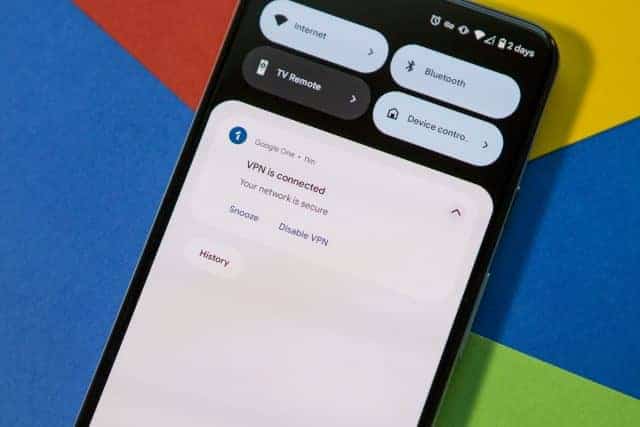
- Find the VPN notification (Google One icon) from your lock screen.
- To get the notification, swipe down a bit.
- And tap Snooze when you find it.
Initially, your VPN will snooze for five minutes and then connect automatically. However, if you want to extend the snoozing time, go to the Benefits section of the Google One app. Find Online protection with a VPN, and under the Enable VPN section, you’ll be able to add snoozing minutes as you want.
Ignore Google One VPN for Specific Apps and Games
Once you start using the Google One VPN on a regular basis, there might be a possibility of getting some issues with it. For example, some of your Android apps or games might now be working properly. So, what to do? As every problem has a solution, here’s also you’ll get one.
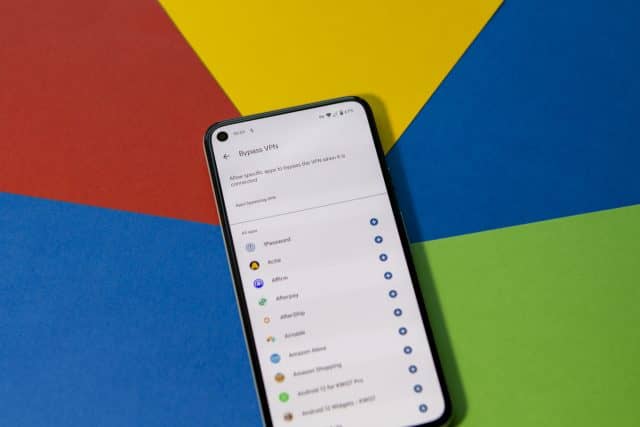
You just need to ignore the VPN on those apps and games which are not working properly with VPN. It’s mentionable this issue will not come across every now and then. Well, let’s how to:
- As always, open the Goole One app first.
- Find Benefits and tap to see further.
- Scroll and find Online protection with a VPN.
- Find View setting and tap.
- What’s there to select, Allow apps to bypass VPN?
- From the list of the apps, time to tap the “+” icon next to the apps with which you’re facing issues.
If you ever remove any apps from your white list, then follow the above steps as it is. There will be just one difference, which is tapping the “-“ button instead of “+” next to the apps.
Insights
Well, here are the ins and outs explained of Google One VPN for your Android. Keep your Android’s information and data safe and secure by relying on Google’s One VPN. However, I would say, instead of using any third-party VPN apps, Google One VPN will be the right choice for you.
Feel free to share the processes with your near and dear ones if you find this worthy. Besides, let me know your valuable feedback in the comment section. Additionally, if you’re familiar with any other process, then don’t hesitate to share with me.
It’s all for now. Till then, take good care of yourself. Most importantly, always keep yourself updated with Ubuntupit’s latest tricks and tips. I’ll be seeing you soon with another new topic.
