Suppose you have written, build, and compiled a program to calculate the Fibonacci numbers among a million numbers. Once the program is built, you may decide to make your raw codes available for others so that they can use or modify your code for further usages. That raw code is called the source code. In other words, source code is the mother code of any package. When you install software on your system, you install the source codes as well. Actually, source code is nothing but the millions of code lines you can compile to build a complete package.
Many Linux users don’t even know that they are using source codes regularly. When you clone a code from GitHub or another package repository, you actually download the package’s source code. Later, you can install that package on your Linux system through the conventional method of installing software from source code.
Why Install Softwares from Source Code?
Source codes are free and open-source. Most of the packages on Linux are free and open-source, which means you can use the source codes to modify the package. The perfect example of modifying the source code to build the next level of software could be building the Tor browser by modifying the Mozilla Firefox’s source code. Moreover, researchers can also use the source code to understand the coding algorithm, code compilation and know how it works.
Mostly, you can’t see any source code on any Mac or Windows packages; they come directly as a complete package; that’s why you can’t modify the Windows and Mac’s applications. As Linux believes in making everything free and open-source, you will find the source codes for most of the Linux software.
Making the source codes open and free is also beneficial for software companies and organizations. Many developers can work on that source code to develop and find bugs. Many organizations are hiring developers to work on their source code to make packages better and more user friendly.
Install Software on Linux from Source Code
When we want to install any software from the source code on our Linux system, we need to download that package’s complete repository. Then we need to understand the filesystem and algorithms of that source code. We just can’t put the source codes in any directory. We need to find the right directory for the specific source code. If we can’t find any suitable directory, we may have to make a new directory to install those packages via the mkdir command.
I must admit that Git is still the leading open-source software repository Hub for developers and new learners. Using source code is helpful to install an older version that is not available on the official store. You can modify and change the build version to get the older versions. Of course, doing this kind of stuff requires a clear concept and excellent command over software development.
Here is an interesting fact about using source code, if you find any bugs inside the source code, you can report it to the software’s organization, and if they think that you are right, they might hire you into their team, or they will congratulate you for helping them.
This post will see how you can install software on your Linux system using the source code. As GitHub is still a popular hub for the software repository, we will use GitHub as the source code container.
Step 1: Find The Software Repository
In GitHub, we can search and find the source code of the desired software we want to install on our machine. In this case, I will install the wxMEdit software on my Linux system using the source codes. I am describing them for those who don’t know what wxMEdit is; the wxMEdit is a popular and handy notepad that you can use to take quick notes.
First, you need to go to the exMEdit page on GitHub. You can use this link to open the wxMEdit’s page on GitHub.
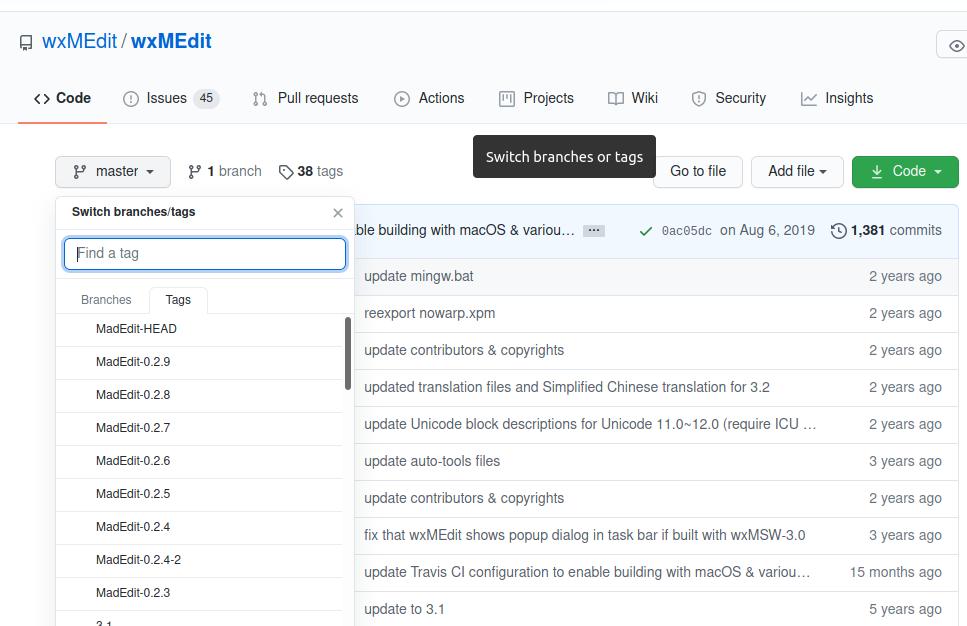
After going to the GitHub link, you will find the list of source codes and the date of developers’ modification. At the right bottom side, you will also find the name of the contributors.
However, to install the package, we need to download the desired version’s source code. Either we can clone the path or directly download the current version of this package. You will find the Master/Tag option at the top-left corner, where you will find the software versions and other details.
If you look at the list of source codes, you would see that some of the files were stored a few hours ago, and some were modified almost five years ago. That means the developers check and update the source code regularly. This is the real beauty of open source code; you barely get a corrupted software. If you are a software developer, you can also modify the source codes only if it is necessary.
Step 2: Install Git on Your System
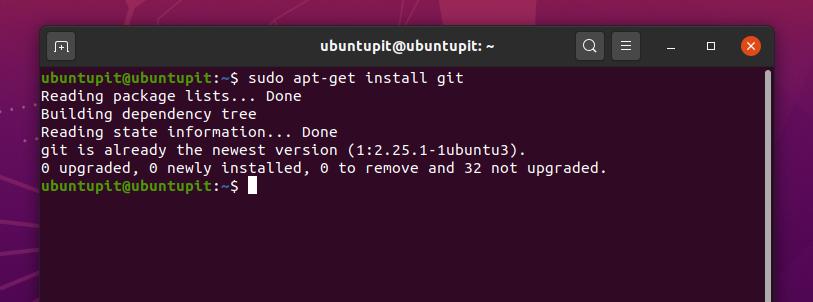
However, download or clone the source code of the desired version of your software. I must mention that, to install packages from GitHub; first, you need to install Git on your Linux system. You can use the following command to install Git on your system. It’s not urgent to have a Git account to download and install packages from GitHub. You can follow the instructions to install Git on your Linux system.
Use the following command-lines to install Git on Debian and Ubuntu Based Linux system.
sudo apt-get update
sudo apt-get install git
To install Git on Red Hat Linux, Fedora, and CentOS, first, you need to install the extra Linux packages on your system. Use the following command-lines to install the OpenSSL, Perl, and Epel packages on your system.
sudo yum install epel-release
sudo yum install curl-devel expat-devel gettext-devel openssl-devel perl-devel zlib-devel asciidoc xmlto docbook2X
Use the following YUM command-line on your terminal to install Git on Fedora, CentOS, and Red Hat Linux.
sudo yum install git
Step 3: Download the Source Code
You can go to the Tag section and find the source codes of your desired software. By default, the webpage will bring you to the latest version of the software. When you select any other version, it automatically reloads the page’s URL and brings you to the specific version of that package.
Suppose I want to install the latest version of wxMEdit on my Linux system, so when I select the build version from the Tag menu, it redirects me to the following address. To download the source codes of that package, you can either use the Download Zip button, or you can copy the URL to download the files through the wget commands.
In this case, I will use the wget command to download the source codes. You can use the following command line given below to download the package. You can use this link to go to the GitHub page of wxMEdit.
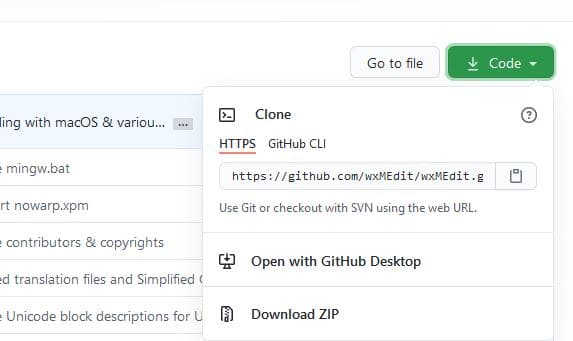
Now, run the following wget command on your Linux terminal to download your software’s source code. If you don’t set any download directory, the source codes will usually be downloaded into the compressed version on the home directory.
wget https://github.com/wxMEdit/wxMEdit.git
You can also use the git clone command to download the source code.
git clone git://github.com/wxMEdit/wxMEdit.git

Once the download is finished, you can run the following GNU zip tool commands to unzip and extract the source codes. You can also use the graphical user interface method of zipping and unzipping on your Linux system to extract the source codes.
tar zxvf pkgname-version.tar.gz
tar jxvf pkgname-version.tar.bz2
unzip packgename.zip
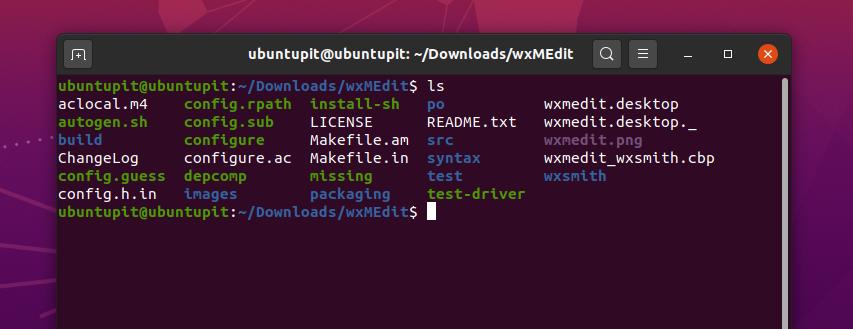
When the download and decompressing processes are finished, you can find your desired package’s source code in the directory where you extracted. To view the list of source codes, you need to enter the Downloads directory then run the ls command to see the list. In my case, I am going to see the source code list of the wxMEdit software.
cd Downloads/
~/Downloads/wxMEdit$ ls
Step 4: Install Software from Source Code
Now, we will use the make tool to compile and build the packages from the source code. To install the software from the source code, we need to open the package directory. Then we will run the following make command to install the software.
~/wxMEdit$ make
~/wxMEdit$ sudo make install
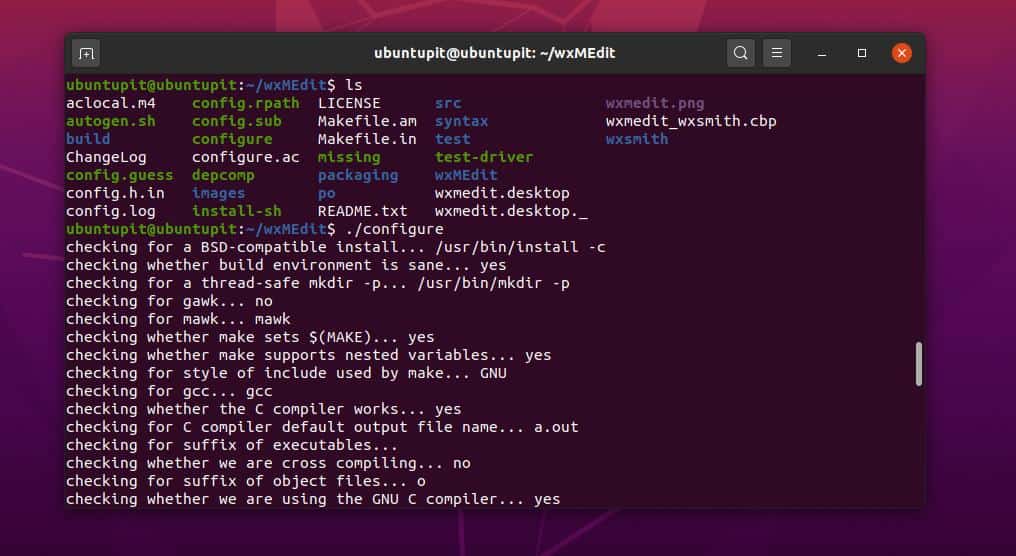
Now, we will enlist the source codes to configure the package. From all the list of source codes, we will find the configure script. We have to run the configuration script to complete the installation process. You can follow the command-lines given below to finish the process of installing software from source code.
~/wxMEdit$ ls
~/wxMEdit$ ./configure
Extra Tip: Access the Installation Directory
Most Linux users use the default package manager to install any packages on their system. Package managers can automatically download and install the package on your Linux system. But, installing software on Linux via the source codes provides you more accurate knowledge about the package.
If you find any permission error while installing software from the source codes, ensure that you have granted the application to use the installation directory. Here, a sample command-line is provided to make the concept clear.
cp pkgname /usr/local/bin/
chmod +x /usr/local/bin/pkgname
Final Words
As a Linux user, you have already entered into the open-source world. If you are an average PC user, it doesn’t matter whether you are installing your software from the open-source repository or not. I would humbly request you don’t use open-source software for unethical usages. But if you are a software developer or a programmer, you can help the open-source community by sharing your programming skills.
I have described GitHub’s concepts in the entire post and how you can install software from open source code. I hope that you liked this post. If you love this post, please share it with your friends and the Linux community. You can also write down your opinions regarding this post in the comment section.

Still not able to get gmapcatcher from github, to make and install on Raspberry Pi 4 Raspbian OS. It failed at step 4. Dose it work for you?