The KVM is defined as a Kernel-based Virtual Machine that is an excellent arrangement for running other operating systems on Linux. It uses the Hypervisor emulator for creating virtual machine environments. It requires the hardware level configuration. The KVM works with the machine’s processor, system memory, hard disk, network, and parameters of the host machine. In Linux, using is KVM is secure and safe. You can manage the storage management, RAM usages, and power. Even you can schedule virtual machines on Linux through the KVM. Now, the issue you might think when you want to migrate and use your Virtualbox hypervisor VMs to your KVM system is starting it all over again, which is time taking and complex.
Virtualbox VMs on KVM in Linux
The KVM is written in the C programming language and is built under the GNU GPL privacy license. It is a great hypervisor for installing a fresh OS into your host PC. But if you need to gather all your prior configured Virtualbox VMs into the KVM, it might be a headache because Virtual box uses the .vdi image for loading OS in the host PC. On the other hand, the KVM uses the QCOW2 extension file pack for executing OS into the host server/machine.
Fortunately, since Virtualbox and KVM are both open-source virtualization tools, so in Linux, you can transfer all your Virtualbox VMs into KVM.
If you’re new to virtualization in Linux, please go through the post where I’ve described the methods of installing hypervisors for running VMs in Linux. In this post, along with the basic concepts and fundamentals of Virtualbox and KVM, we will see how to use Virtualbox VMs on KVM in Linux.
Method 1: Convert VM Image to KVM Image
In this method, we will see the method of listing VM images on Linux and see how many images are there in the system. Later, we will convert the image into the KVM image file. The steps are pretty straightforward and nifty. Let’s began.
Step 1: List Existing VirtualBox Images
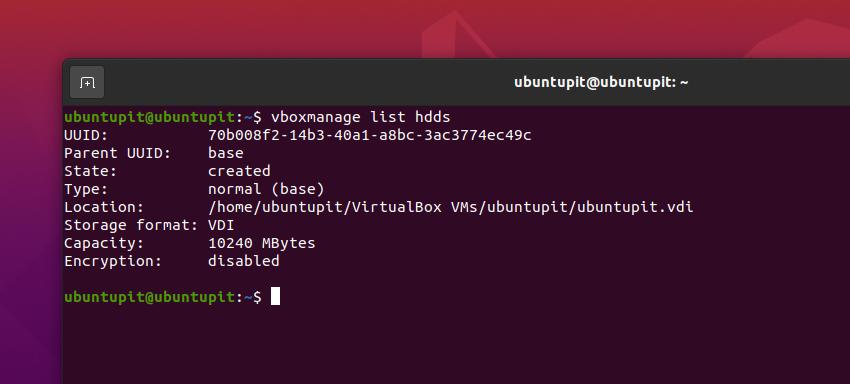
As this post describes the method of using the VirtualBox VMs to KVM, so let’s assume that our system already has Oracle’s VirtualBox installed and there is an active VM on the Linux machine. In the beginning, we can start with finding out if there is any VM available on the machine or not. You may run any of the following commands given below to list the VirtualBox VMs installed on your Linux system.

$ VBoxManage list hdds
$ vboxmanage list hdds
Step 2: Convert VDI Image to RAW Disk Format
Now, we will select one of our Virtualbox VMs and convert it into a raw image format. As I mentioned earlier, the VirtualBox uses the .vdi format, so we will now convert the .vdi image into the raw image format. Based on your CPU, RAM, and hardware configuration, the conversion process may take a while to finish.
Please run any of the following commands given below to make the conversion. The command will first select the VM image from the hard disk, and then it will transform the file into a RAW image.
$ VBoxManage clonehd --format RAW /home/james/VirtualBox\ VMs/debian/debian.vdi debian_10_Server.img
$ vboxmanage clonehd --format RAW /home/james/VirtualBox\ VMs/debian/debian.vdi debian_10_Server.img

Since the VM file transformation usually takes a long time and resource, so after you finish the conversion, please verify the RAW image file and ensure that the entire file has converted successfully.
$ du -h debian_10_Server.img
Step 3: Convert RAW Image Disk Format to KVM Format
Once we are done converting the VM image into a raw image, it’s now time to transform the raw image into KVM’s qcow2 image format. The conversion will preserve all the data that you had been using into your VirtualBox VM. Please run the following command supplied below to make the conversion to the KVM image file.
$ qemu-img convert -f raw debian_10_Server.img -O qcow2 debian_10_Server.qcow2
After finishing the conversion, warp up the process by checking the file size and details on your Linux machine.
$ du -h debian_10_Server.qcow2
Method 2: Convert DVI to Qcow2
Converting the VirtualBox VM DVI image to a KVM Qcow2 image format is another convenient and powerful method to migrate the VirtualBox VMs image to Linux KVM. First, we will need to install the virt manager (Virtual Machine Manager) tool on our Linux distributions so that we can do the image converting tasks.
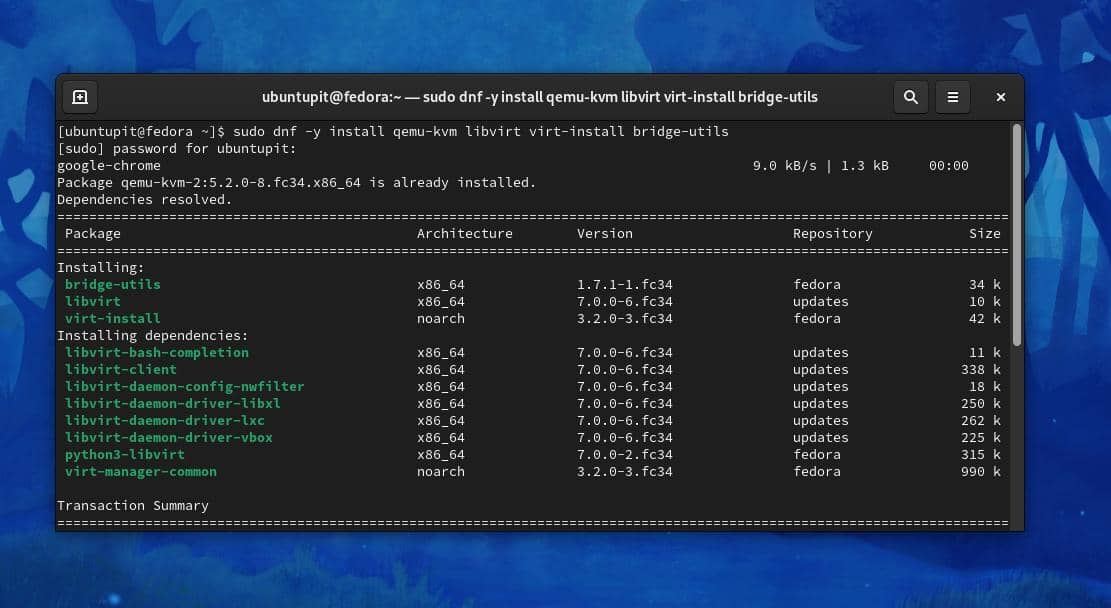
Please run the commands given below on your terminal shell according to your distribution to install the Virtual Machine Manager tool.
- Install Virtual Machine Manager on Red Hat/Fedora Linux

sudo dnf -y install qemu-kvm libvirt virt-install bridge-utils
sudo yum -y install qemu-kvm libvirt virt-install bridge-utils
- Get the Virtual Machine Manager on Ubuntu/Debian Linux
sudo apt-get -y install qemu-kvm libvirt-bin virtinst bridge-utils
Once the Virtual Machine Manager installation ends up, you may now browse the VirtualBox VM directory for cloning your current VM image.
cd ~
cd VirtualBox VMs/ubuntu-server/
Run the following command on your terminal shell to export the current VirtualBox VM DVI image on your filesystem.
VBoxManage clonehd box-disk1.vmdk ubuntu.vdi --format vdi
When the previous task ends up, you may now run the following QEMU command supplied below to convert to DVI image to Qcow2 image for use on KVM Linux.
qemu-img convert -f vdi -O qcow2 ubuntu.vdi ubuntu.qcow2
When the conversion finishes, you can now use the qcow2 image file on your KVM Linux. After the conversion is finished, you can try running the VMs into the KVM. If something goes wrong, please restart your computer then try again.
Final Words
Both Virtual machines and KVM works smoothly on all major Linux systems. Hence, you might need to migrate from one hypervisor to another without losing any previously configured data and users details. Moreover, KVM does offer a few additional features that Virtualbox doesn’t. In the entire post, I’ve described how to use Virtualbox VMs on KVM In Linux.
Please share it with your friends and the Linux community if you find this post useful and informative. You can also write down your opinions regarding this post in the comment section.
