Most Linux users do not bother with the Windows operating system. But, if you’re a professional user, sometimes, you will need to get back to Windows for testing and checking purposes. However, besides experimenting and developing, there are many tools that run well in Windows and won’t even run on Linux. In these circumstances, you might need to get back to the Windows operating system. If you need to get a dual-boot arrangement system on your PC, you will need to create a bootable Windows ISO file on the USB from your Linux system to get the secondary OS.
Create a Windows Bootable USB on Linux
In Ubuntu and other Linux distros, there are a few powerful tools that let you create a bootable USB drive of Windows ISO files. Besides these, in Ubuntu and many other distributions, you can directly create a bootable disk and mount the files on a temporary directory.
Before I go into the steps where I will show the methods, I assume that you have the ISO file downloaded on your filesystems and you know the BIOS method of your PC and what type of filesystem partition you need, like MBR or GPT. In this post, we will see how to create a Windows bootable USB on Linux.
Method 1: Create a Windows Bootable USB on Linux with WoeUSB
In this method, we will see how we can create a bootable USB file of Windows from a Linux host machine through the app called WoeUSB. The WoeUSB is one of the oldest and most effective tools for making bootable files.
Step 1: Install WoeUSB on Linux
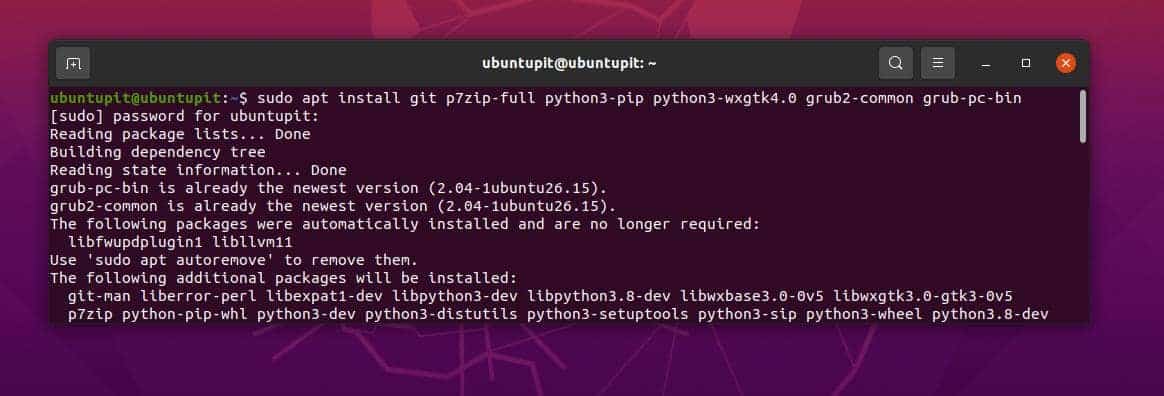
As the WoeUSB is a third-party app, so we will need to install the tool first on your Linux system. The installation process of the WoeUSB tool is easy and straightforward. First, you need to get the package dependencies on your machine. Please execute the below-mentioned command according to your distribution.
Install WoeUSB dependencies on Ubuntu/Debian System
sudo apt install git p7zip-full python3-pip python3-wxgtk4.0 grub2-common grub-pc-bin
Get the dependencies on Arch Linux
sudo pacman -S p7zip python-pip python-wxpython
Install WoeUSB dependencies on Fedora/Red Hat Linux System
sudo dnf install git p7zip p7zip-plugins python3-pip python3-wxpython4
Now, we will need to clone the Git repository of the WoeUSB on our system. The below-mentioned commands would be executed on all major systems.
git clone https://github.com/WoeUSB/WoeUSB-ng
cd WoeUSB-ng
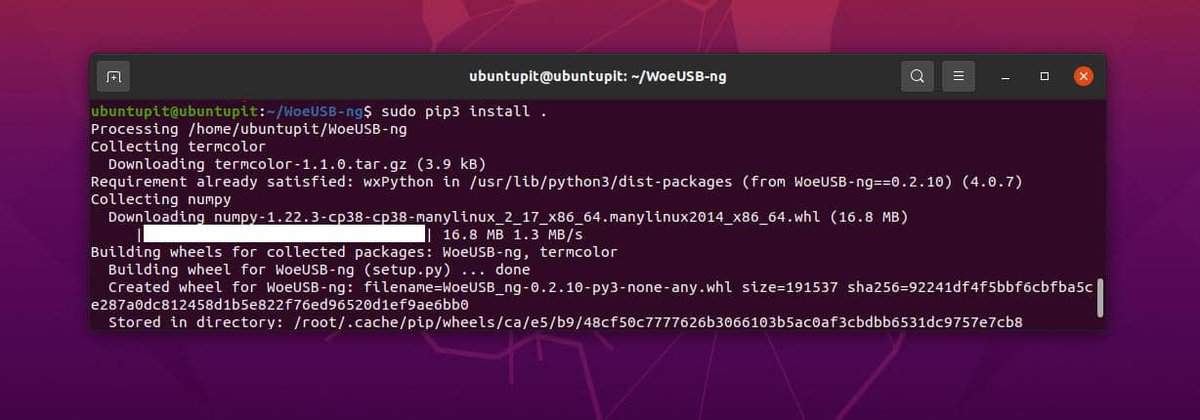
Finally, Execute the below-mentioned comment on the terminal shell to get the tool installed on your system. Please don’t ignore the dot (.) at the end of the command.
sudo pip3 install .
Step 2: Open WoeUSB
Once we are done with installing the WoeUSB, we can now fire up the tool and get started. We can use either the conventional method or we can just type the below command on the shell and hit Enter.
woeusbgui &
Step 3: Create the Windows Bootable USB
So far we have seen how to install the WoeUSB tool and how to open the tool on a Linux system. When you open this told you will see that the tool is a graphical user interface-based tool. Here I have pointed out the steps that you will need to do now to create a Windows bootable USB file on Linux.
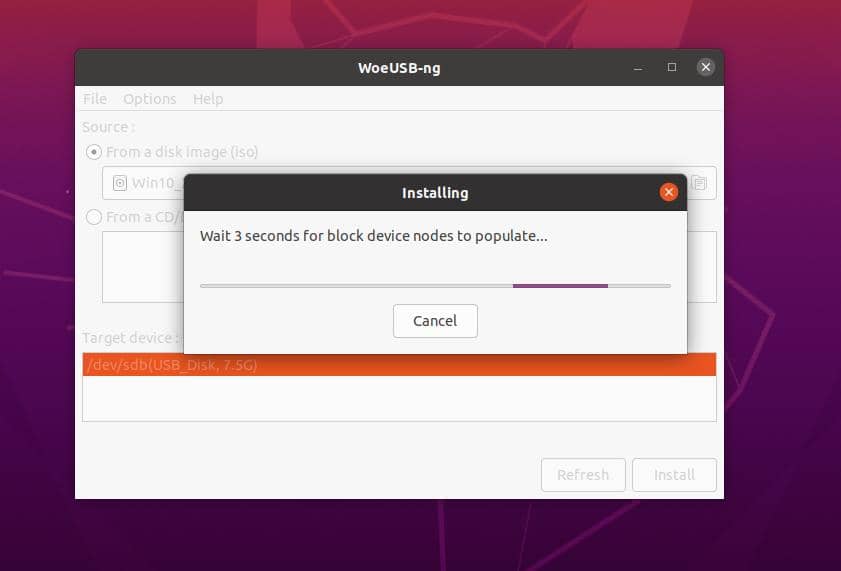
- At first, you will need to click on the from disk image menu to select your Windows ISO file on the tool.
- Now under the target device, you will select the USB pen drive or the USB disk drive where you want to create the bootable Windows files.
- Finally, click on the install button to late the tool to create the bootable file.
- Please wait until the tool finishes creating the bootable file and don’t close the window until it finishes.
It will take a while to initialize the process, the progress status will be displayed on the WoeUSB tool.
Method 2: Create a Windows Bootable USB on Linux with balenaEtcher
The Etcher tool is pretty similar to the WoeUSB tool that we have seen earlier. To create the bootable USB stick with this tool, you will need to get the tool first on your Linux system.
Step 1: Instal the Etcher Tool on Linux
As the Etcher tool is very famous, the developers have already made both GUI and CLI methods available to install this too. Here, we will see both GUI and CLI methods to install the Etcher tool.
1. GUI Method to Install Etcher
The Etcher tool is very famous among the Raspberry Pi board and micro-computer users. This tool is very handy for creating and burning ISO files very effectively and it ensures an errorless output. You can download the Etcher AppImage tool from here for your Linux system.
After you download the AppImage file, extract the file on your system. Then right-click on the file and hover over the Properties tab.
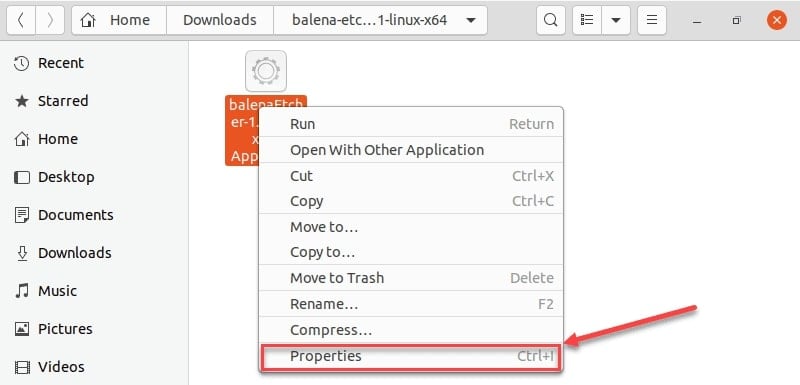
Then go to the Permissions tab, and finally check the Allow executing file as a program. You can now double-click on the AppImage file to run the Etcher tool.
2. CLI Method to Install Etcher
If you find any issues installing the Etcher tool with the above-mentioned GUI method, or you prefer to use the CLI method; this step is totally for you.
First, you will need to execute the below-mentioned echo command on the new terminal shell to get the resource file on your system.
echo "deb https://deb.etcher.io stable etcher" | sudo tee /etc/apt/sources.list.d/balena-etcher.list

Now please execute the below-mentioned APT command on your shell to get the repository queries on your Debian or other Linux systems.
sudo apt-key adv --keyserver hkps://keyserver.ubuntu.com:443 --recv-keys 379CE192D401AB61
Finally, you can now update your aptitude repositories and run the below-mentioned comment to install the Etcher tool on your system.
sudo apt update
sudo apt install balena-etcher-electron
Step 2: Use Etcher Tool to Create A Windows Bootable USB
So far we have seen how to install the Etcher tool on a Linux System. we will now see how to use this tool to create a bootable USB disk for Windows. Once you open the tool you will find all the options and buttons are self-explanatory that you will not need some additional help or guideline to operate this tool.
Please note when you choose a Windows ISO file on the Etcher tool, it might show a warning with a suggestion to use the WoeUSB or Rufus tool for creating the Windows bootable file. However, you can ignore that warning and proceed.
Please be mindful while you choose the USB device because this Etcher tool is going to erase all the data from the USB device. If you accidentally choose any other directory or folder you cannot go reverse to back up the data. Nonetheless, Here I am adding the steps in a few points so that you can get the steps easily.
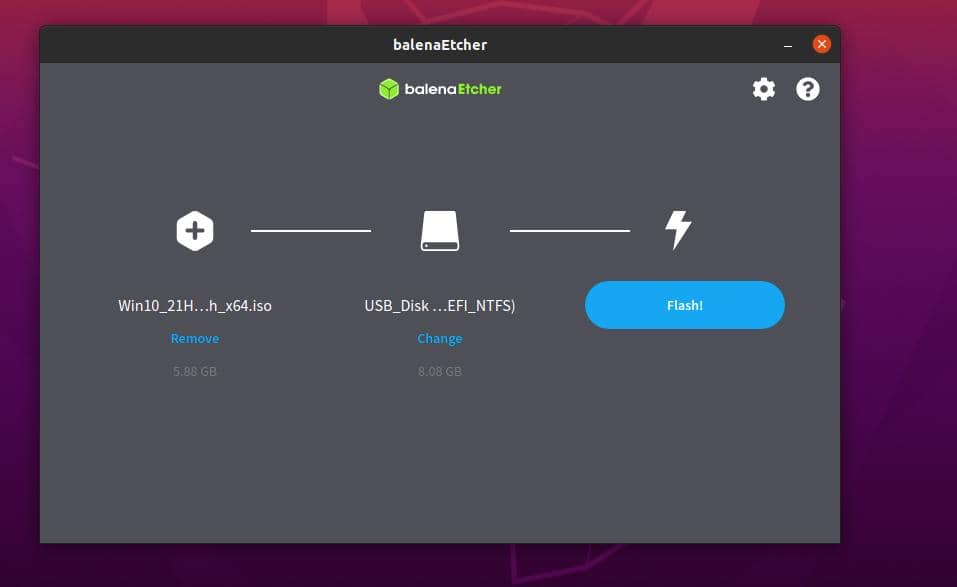
- First, you will need to open the Etcher tool on your system.
- Now you will need to choose the ISO file from your file system that you want to use for creating the USB disk.
- After you choose the ISO file you will now need to choose the USB device.
- Finally, click on the flash button from the Etcher tool it will instantly initiate creating the bootable device.
Method 3: Mount ISO on the FileSystem
This method is pretty much basic and you won’t need any additional third-party software or tools to make a bootable disk on your Linux System. In this method, we will use the in-built file manager and the disk mounting tool that Linux already offers with the operating system.
When you have the ISO file downloaded to your system, you can just right-click on the file and choose Open with Disk Image mounter on the system. This method will automatically convert the ISO files into a bootable format under the filesystem and allow you to copy the entire bootable files into a USB disk.
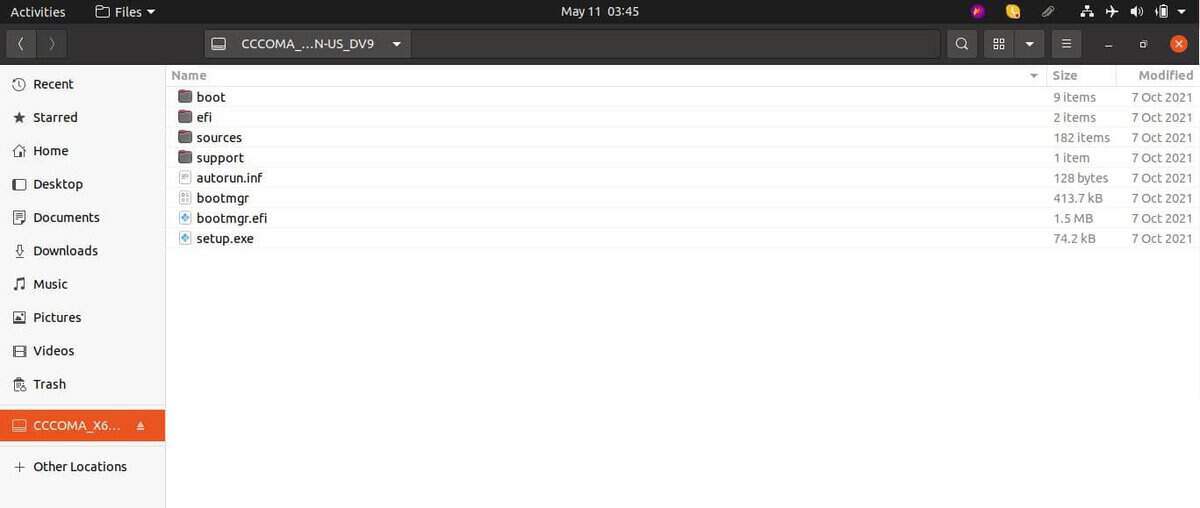
Please note, that the bootable files will stay for a temporary basis mounted on the system. If you reboot the system the mounted bootable files will be gone. So before rebooting or restarting, please copy the files into a USB disk.
Insights!
In the entire post, we have seen how to create a Windows bootable USB on Linux. In the above post, I have mentioned two excellent tools for creating the bootable device, there are other tools available on the web as well.
Please be careful when you choose a third-party app on your system, there are many tools that do not work for creating a bootable USB device on Linux. Before you install an app, please read the reviews carefully to check if this is a hoax or not.
In the entire post, we have seen three different options for making a bootable USB on Linux. These methods are executable in all major distributions. Besides these, you can also try using the Unetbootin tool for creating a bootable USB disk.
If you find this article has been useful for you, please do not forget to share this post with your friends and the Linux community. We also encourage you to write down your opinions in the comment section regarding this article.
