CentOS has gained a lot of popularity in recent years because of the stability and productivity it provides. If you are like most people using Raspbian, it might get boring after working with it for a long time. So, why not make a change for fun? Who knows, you might actually get fond of the new system! In this article, I will guide you step by step on how to install CentOS on a Raspberry Pi. So, stick to the end to be a proud user of a new rising operating System.
What is CentOS?
Taken from the Red Hat Distribution (RHEL) sources, CentOS is a completely free Linux distribution and a stable and manageable platform for Linux users. It mainly helps companies get all their resources together and build them on the CentOS platform. With this view, CentOS has been giving excellent service as a community-supported distribution since 2004 and is often regarded as the most used Linux Distribution after Debian.
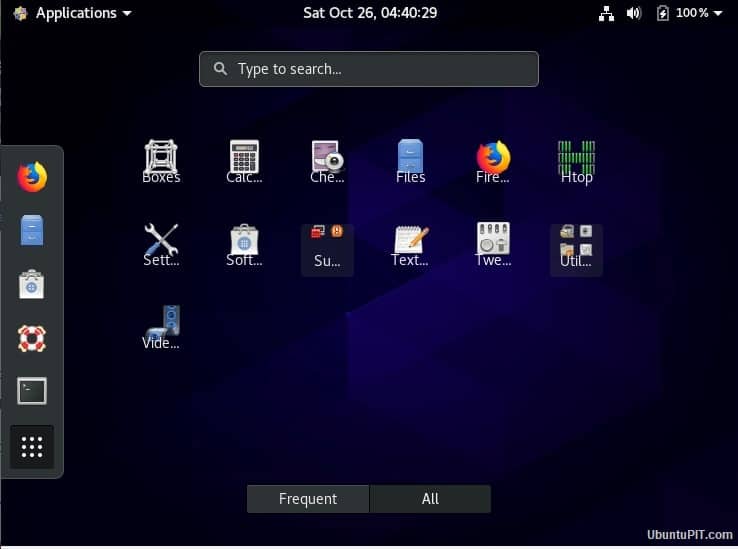
The CentOS Project
To provide a rich platform for open-source communities, the CentOS project is a free software effort. It offers a development system for the cloud providers, including the hosting community.
Install CentOS on a Raspberry Pi
If you are a Raspbian user, adapting to the new commands of the CentOS might seem troubling, but it’s totally worth it. If you have no idea about installing CentOS on a Raspberry Pi, you have reached the perfect place to learn it. This step by step guide will show you everything you need to make the installation successful.
Things You Will Need
Managing to get all the necessary equipment before starting the project is very important if you want to succeed. You will need the following things to install CentOS on a Raspberry Pi:
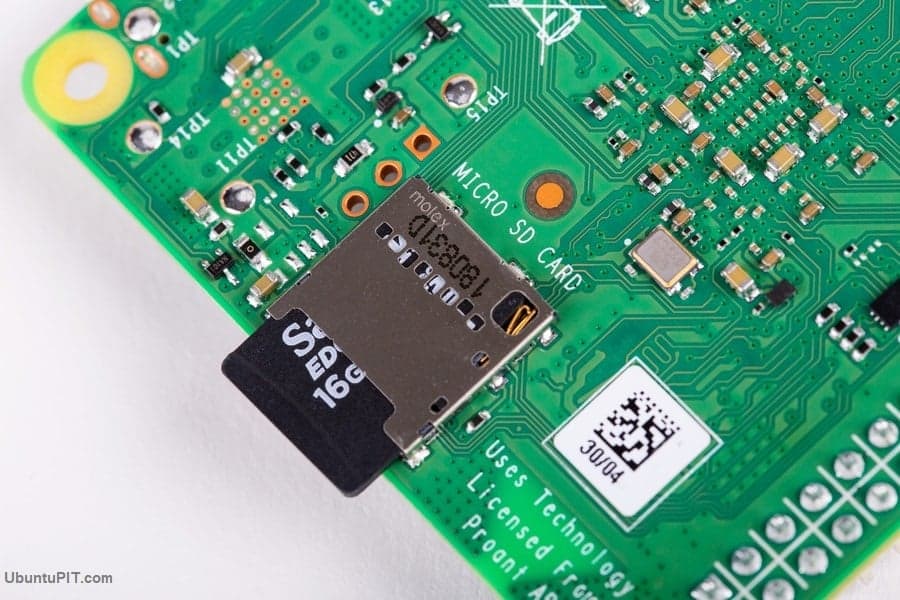
1. Raspberry Pi: This is the first thing you will need to make this project successful. While any version of the Pi will work, try to get the latest version, now the Raspberry Pi 4.
2. MicroSD Card: The amount of storage will depend on the purpose of your use. Generally, any SD card above 4 GB will do excellent work in this case. But you will need more if you are planning to use it for large tasks.
3. Ethernet Cable: While wireless technologies are more popular nowadays, ethernet cables are always more reliable and provide fast service.
4. Power Adapter: You will need something like a power adapter like a USB power cable.
Step 1: Formatting the SD Card
Before installing the CentOS on your Pi, you will have to make sure that the SD card is empty. While you can use the FAT32 to blank your card, it can disturb if your space is more than 32 GB. In that case, try the following method:
If your SD card has large storage (more than 32 GB), you should use an SD Card Formatter, which will remove any previous data from the card in the standard way. Once you install this tool, the icon will be shown on your start menu. Open it, and you will see a dialog box with settings options.
Make sure it has selected the right drive in the “Select Card” box. If not, change it manually. This is an essential thing to do as selecting the wrong file can wipe out your important data. Then, select “format”. You can choose whatever you want, but “Quick Format” will be faster than the “Overwrite Format”.
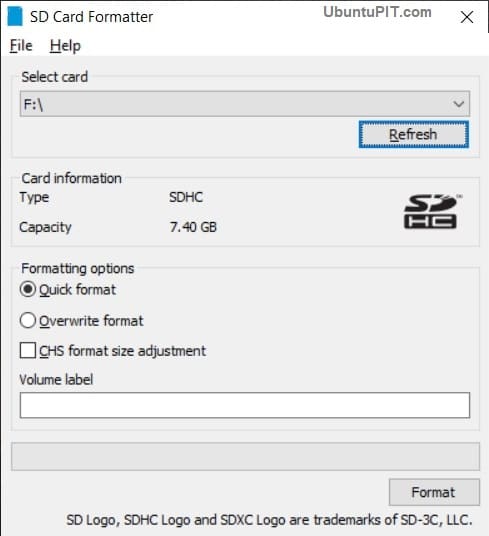
After that, write something on the “Volume Label”. You can enter anything you would like, but it only accepts alphanumeric characters. Once you are done with all the settings, click on the “Format” button, and you will get a warning about the data getting lost. Select “yes” to proceed.
Now, if your card is less than 32 GB, then you have nothing else to do and can proceed to the next step. However, if it’s more than 32 GB, there are still some things left to do to empty the card properly. In this case, you will need the FAT32 file system with a tool called the “GUI Format”.
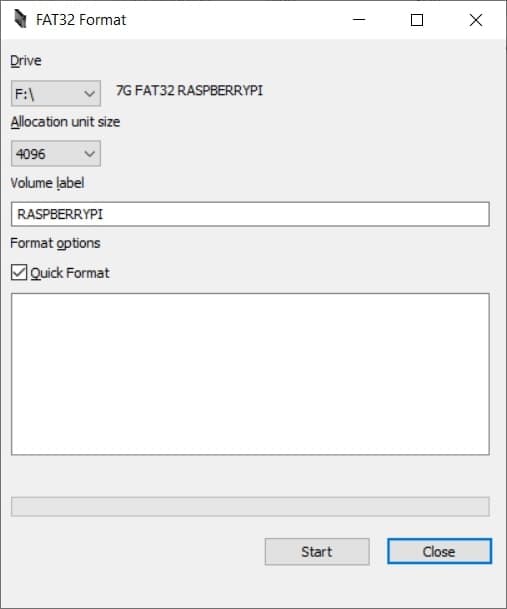
After installing and opening the file system, you will get almost the same box as the SD card formatter. You can select and write all the same things and then click on “start”. You will again get a confirmation box. Select “OK” to start formatting.
Once it’s finished, your SD card will be ready for CentOS installation.
Step 2: Downloading the CentOS
Fortunately, CentOS has a version made especially for the Raspberry Pi; you will have to visit this official page to download that version to install CentOS on a Raspberry Pi. You will see a full list of CentOS mirrors on the page, from which you will have to choose one based on your preference. However, the one showed on the top is basically the best one for your region.
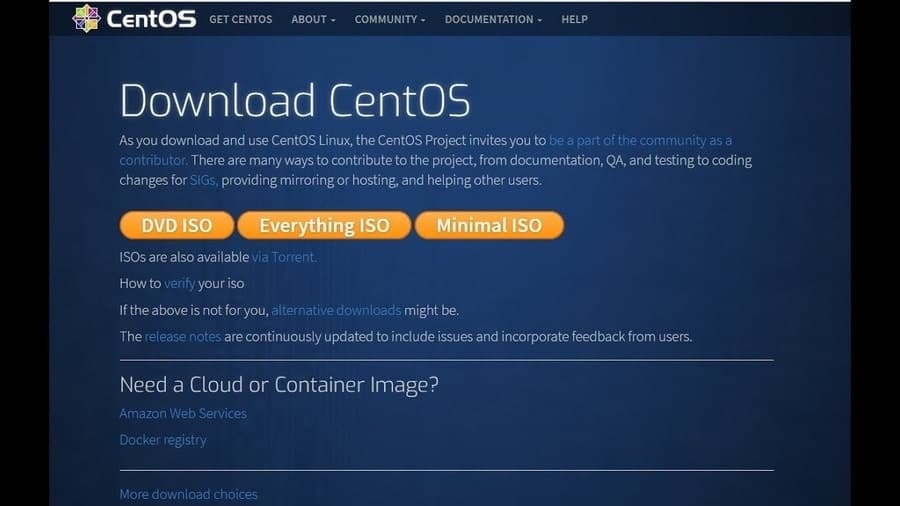
Once you have selected the appropriate mirror, you will be directed to a page with several files for you to download. Now, it’s time for you to make some choices. You will find three different options for your Raspberry Pi:
1. CentOS-Userland-7-armv7hl-RaspberryPI-GNOME-1810-sda.raw.xz: This CentOS version comes with a limited number of software, including the Gnome accessories and tools.
2. CentOS-Userland-7-armv7hl-RaspberryPI-KDE-1810-sda.raw.xz: This version includes everything for the KDE desktop environment and tools.
3. CentOS-Userland-7-armv7hl-RaspberryPI-Minimal-1810-sda.raw.xz: This version is the most recommended one that includes a minimal set of tools and reduces bloating from any unimportant applications.
CentOS installation will work with any of the versions I mentioned above. So, you are free to choose any of them. Whatever you choose, make sure the version is compatible with the version of Raspberry Pi you are using. It’s better if you can download the Lite version of CentOS since the heavy application will come with unnecessary resources and command lines.
After you have downloaded your preferable file, you will get a file with an xz extension. If you don’t have anything to extract this file, use something like the “7-zip”.
Step 3: Flashing the SD Card
In this step, we will flash your SD card and write the CentOS image on it. To do that, you will need a tool called the “Etcher”. After downloading the software, start it to execute the next steps.
Firstly, click the “Select Image” option from the window, and you will get a dialog box asking you to select a CentOS Image.
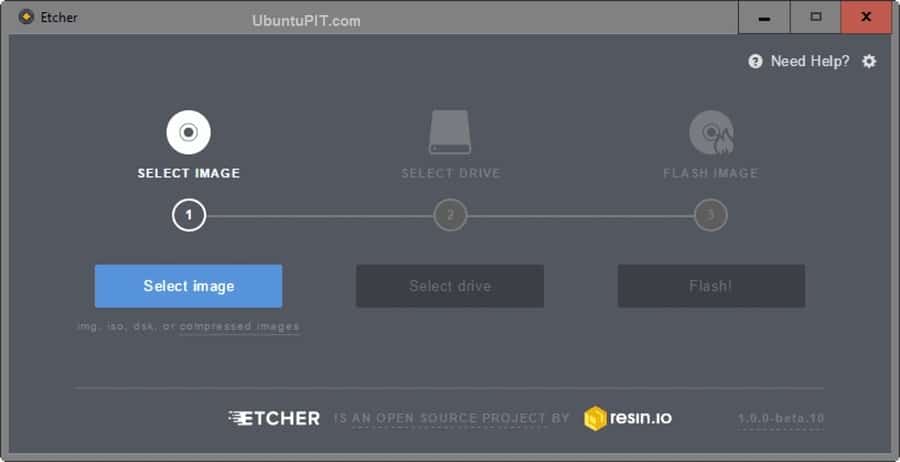
Select the correct file that you downloaded earlier and click on “Flash”. You will get a screen asking for your permission to make changes; select “Yes”.
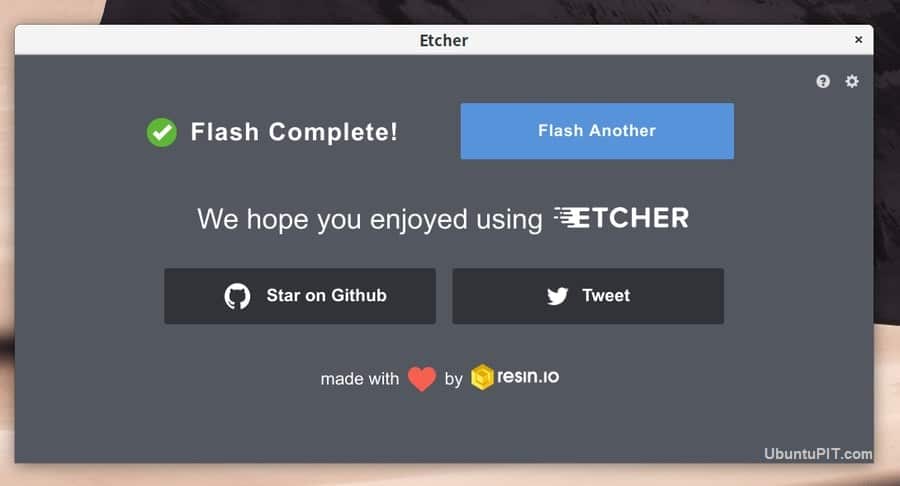
You will get a confirmation after the process is done in a few minutes. After that, you have to connect the SD card with your Raspberry Pi. Then connect your Pi to the internet using the ethernet cable and plug in the power cable. Your Raspberry should ready to run.
Step 4: First Boot
Doing the first boot is different for each version of the CentOS. I am going to walk you through all the options.
Using Gnome Interface
This is only required when you are using the Gnome version of CentOS. Skip this step if you have downloaded the minimal version.
After inserting the SD Card in your Pi, you will see a CentOS settings welcome menu.
- First of all, it will ask you to select a language you want to use. Once you have selected, click on the ‘next” button.
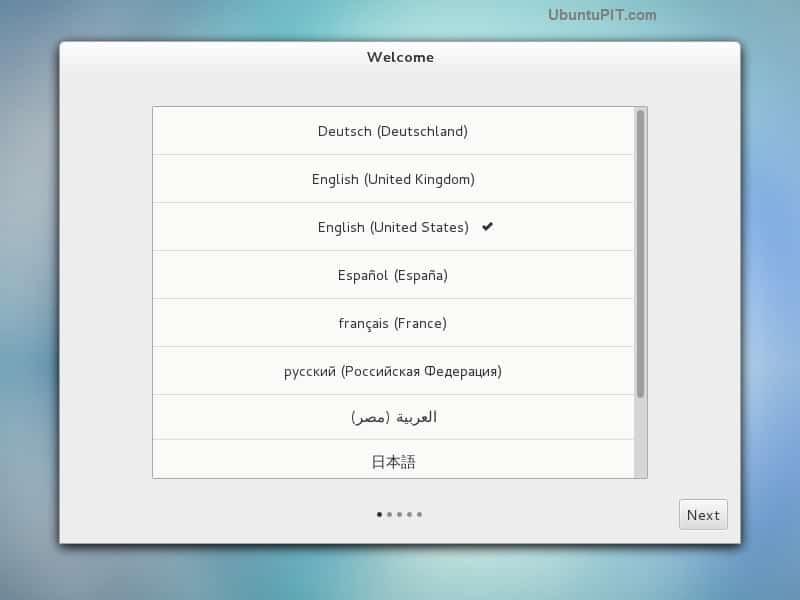
- After that, you will be directed to the keyboard layout settings. It’s really important as the wrong layout can cause you problems later when trying to work on it. Select “Next” when you are done.
- The next option will allow you to convert into wi-fi if you are not comfortable with an ethernet cable. If you don’t want to change it, click on the “skip” button.
- Next, you can change some privacy settings on the CentOS platform, like location services.
- Now, you will have to set the correct time zone for your location. Though CentOS will automatically detect a zone for you, it might not be the correct one. You can search for your city from the textbox.
- Then, it will show you a box from where you can connect your online accounts with the CentOS. Connecting your Google or Microsoft Account will allow the CentOS to synchronize your information like contacts, email or calendar, etc.
- Finally, you will have to create an account with CentOS for your Pi. You will have to input your name and username in the boxes. The system will try to suggest usernames based on your name. But you can also enter your customized ones.
- After that, you will have to set a password for the new account and re-enter the password to match. Once both of them match, you can click on ‘next”.
So, you are done with the CentOS setting on your Gnome interface. After this is done, click on the “Start Using CentOS Linux” button, and you will be directed to the Gnome desktop.
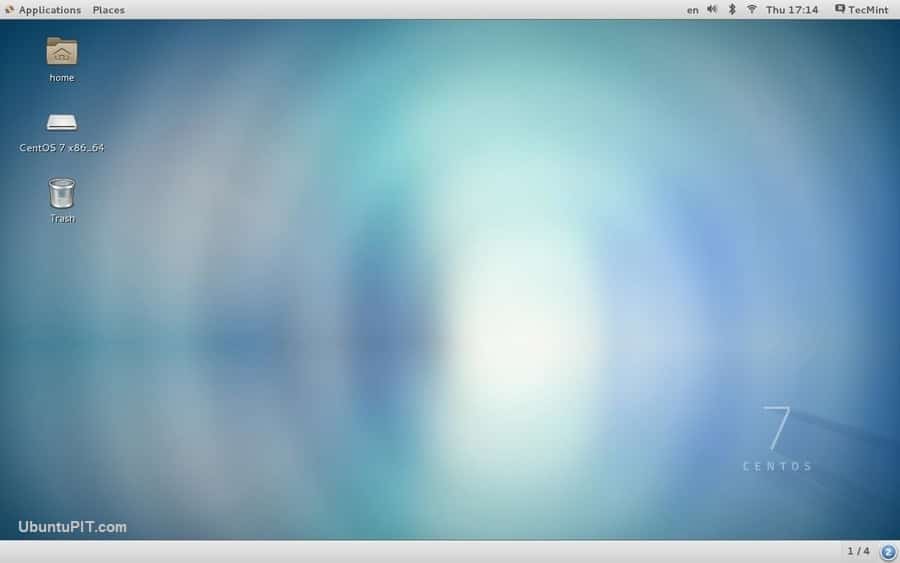
The same thing happens when you are using Raspbian.
Using Minimal Interface
If you are using the minimal version of the CentOS instead of Gnome, this is how you do your first boot:
- At first, you will be asked to log in to the system. The default username is “root” whereas the default password for the root user will be “centos”.
- After logging in, you should really change the default password. Use the following command to do that:
passwd
Enter a strong password since the root user will have access to everything in the operating system.

That’s it. Your minimal version CentOS is now ready and running on your Pi. You can see how easy it is to boot the minimal version than the Gnome version.
These are the most basic things to do to install CentOS on a Raspberry Pi.
Step 5: Using the Packaging Manager
CentOS uses a package management tool called the “yum” which has some similarity with the package used by Raspberry Pi called “apt”. You can use this tool to install, uninstall, or update applications on CentOS.
Installing Applications from the Repository
You will have to refer “yum” and then write the package name like this:
yum install PACKAGENAME
For example, if you want to install “git” you would write the command like this:
yum install git
Uninstalling Applications
Uninstalling an application is quite similar to installing one. You need to follow the same structure. The only thing different will be instead of writing “install”, you will have to write “remove”. Like the following:
yum remove PACKAGENAME
Updating Applications
If you need to update everything that is currently running, use this command:
yum update
If you need to update a specific package or application, write the name after the “update” command like this:
yum update PACKAGENAME
Step 6: Connecting SSH
SSH is not enabled automatically by CentOS. So, you will have to connect an SSH to your device manually. It requires different steps for Gnome and Minimal Version.
Connecting SSH with Gnome
Open the terminal from the Applications followed by the system tools. Then type the following command:
sudo systemctl enable sshd
sudo systemctl start sshd
Connecting SSH with Minimal
The good news is, on the New updated CentOS, the SSH for minimal is enabled automatically. But you will have to switch to the SSH connection as soon as the network starts working.
Step 7: Additional Steps
You will need to have a certain IP address of your device if you want to work remotely with your Raspberry Pi. To do that, start your Pi, login, and write the following command line:
Ifconfig
You will get a window like the following:
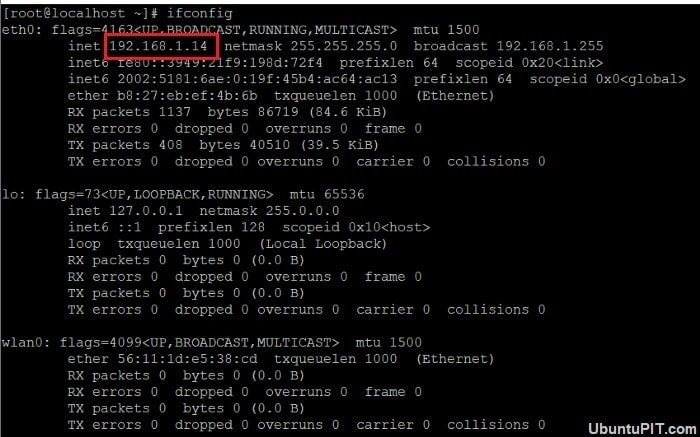
However, if you don’t have any access to your Raspberry Pi yet, you can check the DHCP list with your router.
Finally, Insights
So, this is how you install CentOS on a Raspberry Pi. Though most people prefer to use Raspbian on their Pi, you should try out this new operating system that’s anticipated to take the Linux distribution to a whole new level. In short, this RedHat based system is a good alternative if you are thinking of changing your OS.
The steps I mentioned are the most proven way of installing a CentOS system on your Pi. I hope that you are successful with it.
Hi fella,
You are trying to install armv7hl in RPi4 (which is based on armv8 architecture). I hope it won’t work fella.