
There is no doubt that headers and footers are the two most important sections of any document. Whether it is Google Slides or Google Docs. However, headers and footers contain extra but necessary information such as company names, author names, dates, etc. Considering its importance, you should know how to add a header or footer in Google Slides or Docs.
Three different methods are available for adding a header and footer in Google Slides. Alternatively, Google Docs offers a default method for adding a header and footer. Regardless of the procedure, having a header or footer in Google Slides or Docs matters the most.
Following that, I will take you through my entire post to let you know how easy it is to add a header or footer in Google Slides and Docs. It wouldn’t make any sense here to skip words if that’s what you’re trying to know about the process.
How to Add a Header or Footer in Google Slides
There are 3 methods by which you can add a header or footer in Google Slides. I’m going to show you each method step-by-step below. Let’s start without any further discussion.
Method 1: Add Header By Editing Master Slide
The first method is adding a header or footer by editing the master slide. Ann, to change the master slide, you need to edit the current theme of your presentation using the theme builder of Google Slides.
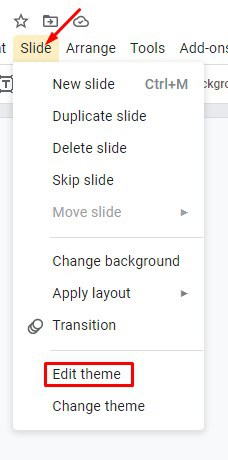
1. At first, go to Google Slide presentation and select as follows- Slide>Edit theme.
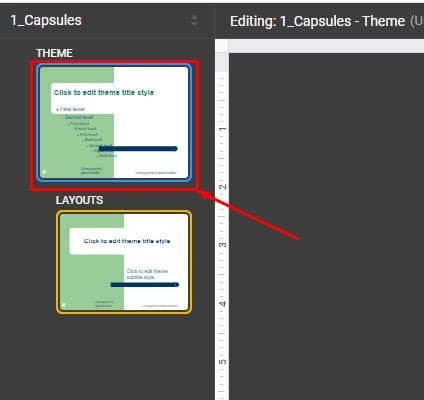
2. Once you’re on the below-resulting page, select the first slide from the top left corner. By doing so, you’re going to edit the current theme of your presentation.
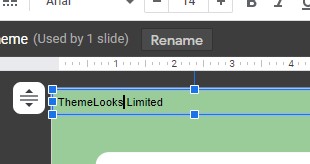
3. Well, as you’ve selected the theme above the layouts, you can now use the menu bar’s text box. To do that, click Insert and then select the text box.
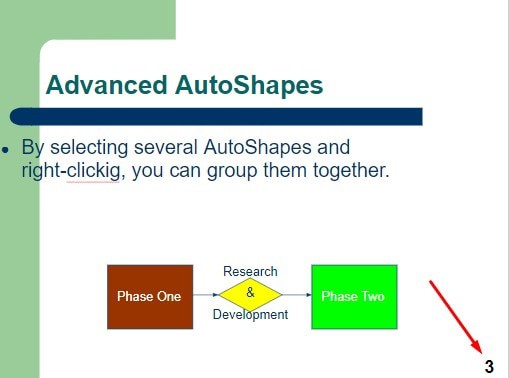
A box will appear instantly; type your text as your preference (header or footer). Finally, move the box up or down on the slide to add the text as a header or a footer.
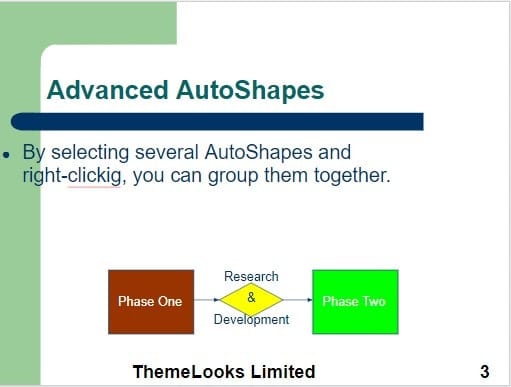
Once you position your text as per your preference, click the X from the top right to close the Theme Builder. And, you’ll be redirected to your slide, where you can see your header or footer on each slide.
That’s how you can have a header or footer in Google Slides using the Google Slides Theme Builder editing process. Let’s move on to the next method.
Method 2: By Using the Slide Number Box
We all tend to use slide numbers in our Google Slide presentation if we have multiple slides in a presentation. Interestingly, you can use the slide number feature to add a footer to your Google Slides.
Whenever you add slide numbers, it will give a text box at the right bottom of your slide. And you can use that slide number box to add a footer to your presentation. Let’s how to do-
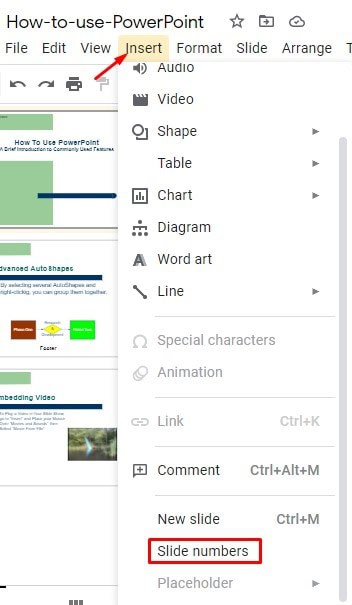
1. Go to your Google Slide presentation, click Insert from the top, and then choose Slide numbers from the resulting window.
2. As you can see, slide numbers have been added to the bottom right corner of each slide.
3. Now, hover over the slide number section, click your mouse there, and a box will appear instantly. Drag the box as you want, and type the text you like to have as a slide’s footer.
However, you might notice a preformatted text (font size, color) whenever you type something. That’s because of using a particular theme. But, no worries. Still, you can change or edit the text formatting using toolbar buttons.
And to do that, select the text-only, leave the slide number unselected and make changes from the toolbar as you prefer.

4. Once you complete your footer text, formatting, and positioning, click Enter on your keyboard. Thus, you’ll get your footer finally in your Google Slide.
N.B: Remember, if you remove your slide numbers from your slide by any chance, the footer text will no longer be there. Because the text and other numbers are interrelated here.
That’s how you can add a footer with the help of having a slide number in your Google Slide presentation. Having said this, let’s move on to the last method.
Method 3: By Inserting a Text Box
This is the easiest method of adding a header or footer in a Google Slides presentation. You just need to insert a text box, type the text, move the box up or down according to your preference, and format it as you want.
That’s it! Your header or footer for your presentation will be ready. Let’s dive into the step-by-step process of how to complete this.
1. Go to the Google Slides homepage and select the file on which you want to add a header or footer.
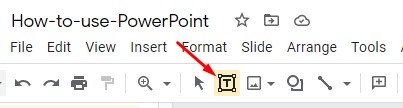
Either you can click the text box icon in the toolbar or click Insert and then choose the text box from the menu bar. Both the process will open a text box section on your slide.
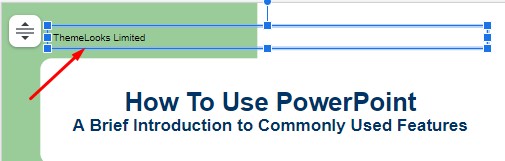
2. As you’ve followed the previous instruction, a text box should appear on your slide. Click on the box; it will allow you to type your text.
As I’ve said before, your text will appear as preformatted based on your theme. So, to customize the text, font, size, color, etc., simply use the toolbar section. And drag to position your text as a header or footer.
3. As you can see, I use the text as a header in my example. Moreover, you can copy the header text and use it as hear to other slides. But what if you want to have a different header or footer for each slide?
In this scenario, you need to edit the master slide that I’ve mentioned above. On top of this, you can see the section below Different Headers or Footers for Each Page. Follow the steps and make everything complete.
Add a Header or Footer in Google Docs
Headers and Footers of any documents contain the date, author name, page numbers, or file name. Basically, the information on the top is called the header, and the information on the bottom is called the footer for any documents.
Method of Adding a Header or Footer in Google Docs
I’ll show you how to easily add a header or footer in Google Docs. Let’s start the step-by-step process.
1. At first, go to Google Docs homepage and open any new or existing documents on which you wish to add a header/footer or both.

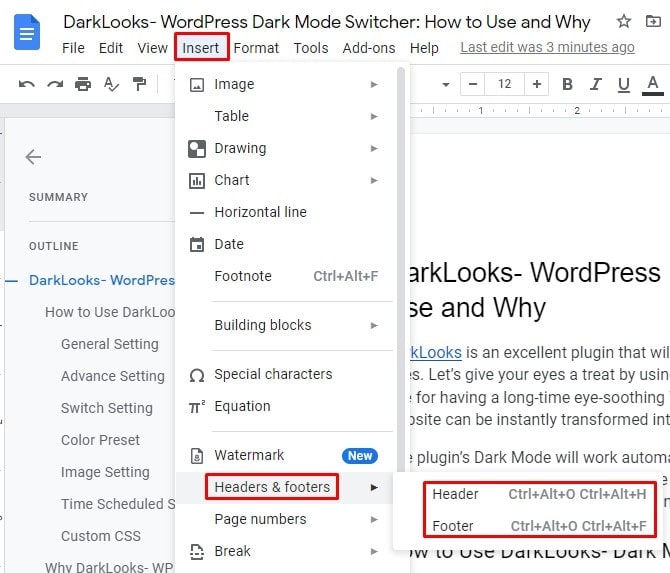
2. Once you’re in your documents, click Insert from the top menu bar and head towards headers & footers. And choose either header or footer (depending on which one you want to add) from the pop-up result.
Moreover, you can use keyboard shortcuts to add harder or footer in your documents.
For adding a header on Windows and ChromeOS, press and hold Ctrl+Alt+O+H. For a Mac, press and hold Ctrl+Cmd+O+H.
On the other hand, for adding a footer on Windows and ChromeOS, press and hold Ctrl+Alt+O+F. For a Mac, press and hold Ctrl+Cmd+O+F.
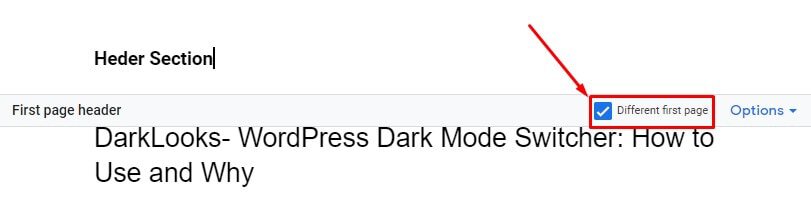
3. Let’s assume you’re enabling the header. The previous instruction leads you into the header section. You can see that through your cursor. Now type the text that you want as a header text. As you can see below, I typed here Header Section as my header text.

4. Remember, the header you type for your first page will be applied to the rest of the pages unless you tik the checkbox Different first page. Therefore, you always need to check the below-marked box to have a different header.
Edit Header or Footer Margins in Google Docs
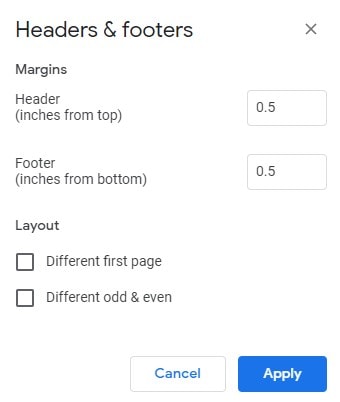
If you wish to edit the margins of your header, click the Options dropdown from the right of your header section. And select Header format.
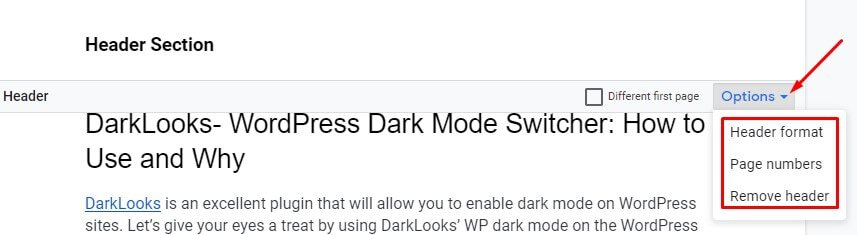
6. In the below-resulting page, set your header margins as you wish and click on Apply from the bottom.
Different Headers or Footers for Each Page
If you wish to have a separate header or footer in your Google document, you must follow some basic instructions. And the instruction is to create section breaks for each page. You’ve to break the default line that Google Docs applied in your documents. How to do that? Let’s see-
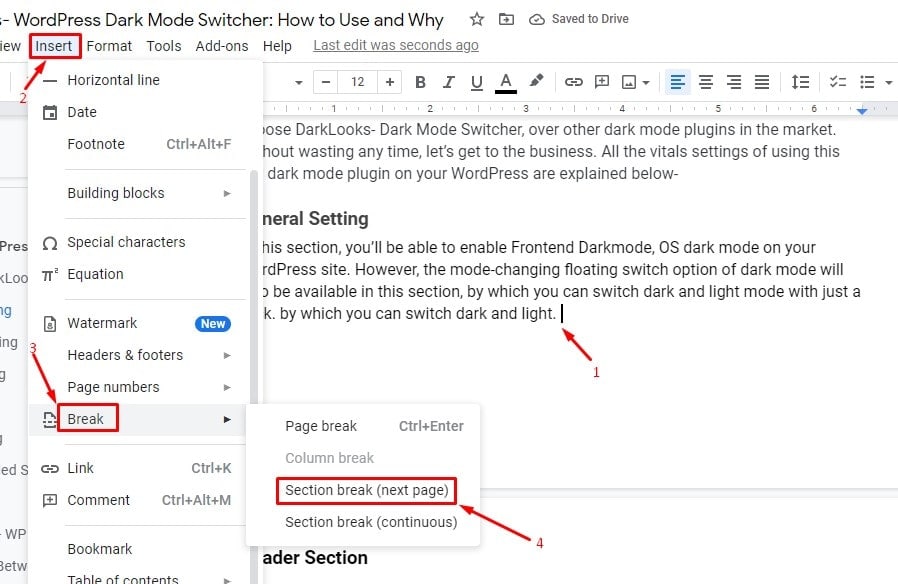
1. Move your cursor at the end of the page, hover over the top menu, and click Insert. From the resulting window as follows: Break> section break (next page).
2. Once you follow so, you’ll be redirected to the next page of your document, where you find an option Link to previous with a box. In this header section, uncheck that box for having individual header text in your Google Docs.
However, you’ve to repeat the same process if you wish to have a separate header for each document page. Once you complete all the editing, click anywhere in your document except the header section or press Esc on your keyboard. As a result, you’ll get a separate header in your Google Docs.

Wrapping Up
Summarizing things, adding a header or footer in Google Slides or Docs is no longer a big deal. Different methods have already been explained above. Go with the one you prefer the most and have your header or footer as you like.
However, if you find these methods helpful and worth sharing, please share and leave your experience in the comment section below. Additionally, if you know of any other procedure for adding a header or footer in Google Slides or Docs, kindly let me know. That would be much appreciated.